MCP鉴权
官方新的修订版本支持了OAuth2的鉴权方式,我们一起来看看
首先是协议要求:
- STDIO不支持,STDIO只支持通过env传入
- SSE/Streamable HTTP应该支持(非强制性)
MCP遵循了OAuth2的标准,主要涉及:
- OAuth 2.1 IETF DRAFT
- OAuth 2.0 Authorization Server Metadata (RFC8414)
- OAuth 2.0 Dynamic Client Registration Protocol (RFC7591)
其中OAuth2.1还在草案阶段,还没成为正式的RFC标准。这边我们简单汇总一下OAuth相关的RFC
| 标准/草案 | 类型 | 状态 | 是否核心 | 简介 |
|---|---|---|---|---|
| RFC 6749 | OAuth 2.0 框架 | ✅ 已发布 | ✅ 是 | 定义了授权流程(授权码、隐式、密码、客户端凭证)和四大角色(客户端、资源拥有者、授权服务器、资源服务器) |
| RFC 6750 | Bearer Token 使用 | ✅ 已发布 | ✅ 是 | 描述如何在 HTTP 中安全使用访问令牌(Bearer Token) |
| RFC 7591 | 动态客户端注册 | ✅ 已发布 | ❌ 扩展 | 允许客户端通过 API 动态注册到授权服务器 |
| RFC 8414 | 授权服务器元数据 | ✅ 已发布 | ❌ 扩展 | 提供 .well-known 端点用于公开服务器配置信息,支持自动发现 |
| draft-ietf-oauth-v2-1 | OAuth 2.1 草案 | ⏳ 草案中 | ✅ 拟核心 | 汇总和更新 OAuth 2.0 核心内容,合并并替代 RFC 6749 和 RFC 6750,剔除不安全授权方式(如隐式授权)并强制使用 PKCE |
OAuth 2.0 & 2.1
OAuth 2.0 - RFC 6749 & RFC 6750
这边简单过一下OAuth的内容,RFC 6749,涉及了OAuth2.0的定义,我们就关注重要的
- 注册Client,获得ClientID和ClientSecret
-
配置在Client上,需要授权的时候,Client(通常是浏览器)跳转/authorize要求用户授权
GET /authorize? response_type=code& client_id=abc123& redirect_uri=https://client.com/callback& scope=read write& state=xyz123 -
授权服务器重定向并带回code
HTTP/1.1 302 Found Location: https://client.com/callback?code=SplxlOBeZQQYbYS6WxSbIA&state=xyz123 -
Client或者Server用授权吗code去换AccessToken和RefreshToken
POST /token Content-Type: application/x-www-form-urlencoded grant_type=authorization_code& code=SplxlOBeZQQYbYS6WxSbIA& redirect_uri=https%3A%2F%2Fclient.com%2Fcallback& client_id=abc123& client_secret=secret456 -
使用token就可以去请求对应的资源了(根据scope决定资源范围)
{
  "access_token": "2YotnFZFEjr1zCsicMWpAA",
  "token_type": "Bearer",
  "expires_in": 3600,
  "refresh_token": "tGzv3JOkF0XG5Qx2TlKWIA"
}
RFC 6750基本就是对OAuth 2.0进行补充了,主要就是AccessToken用Bearer Token来表示(Authorization: Bearer
OAuth 2.0 Authorization Server Metadata - RFC 8414
前面提到的/authorize /token 这类端点都是固定的,或者提前约定配置好的,有些场景就不方便,因此这份RFC提供了一个自动发现的机制,有点类似OIDC中的openid-configuration
GET https://auth.example.com/.well-known/oauth-authorization-server

# 多租户
GET https://auth.example.com/.well-known/oauth-authorization-server?issuer=https://issuer.example.com
就是增加这个端点(就是Discovery Endpoint,.well-known/oauth-authorization-server),用于发现相关的配置,配置(就是Metadata Document,JSON格式的授权服务器元数据)可能如下:
{
  "issuer": "https://mcp-github-oauth.ifuryst.workers.dev",
  "authorization_endpoint": "https://mcp-github-oauth.ifuryst.workers.dev/authorize",
  "token_endpoint": "https://mcp-github-oauth.ifuryst.workers.dev/token",
  "registration_endpoint": "https://mcp-github-oauth.ifuryst.workers.dev/register",
  "response_types_supported": [
    "code"
  ],
  "response_modes_supported": [
    "query"
  ],
  "grant_types_supported": [
    "authorization_code",
    "refresh_token"
  ],
  "token_endpoint_auth_methods_supported": [
    "client_secret_basic",
    "client_secret_post",
    "none"
  ],
  "revocation_endpoint": "https://mcp-github-oauth.ifuryst.workers.dev/token",
  "code_challenge_methods_supported": [
    "plain",
    "S256"
  ]
}
| 字段名 | 是否必需 | 类型 | 说明 |
|---|---|---|---|
| issuer | ✅ 是 | string | 授权服务器的唯一标识符(URL),必须是 https,不能带参数或 fragment |
| authorization_endpoint | ✅ 是(除非不支持基于授权码的 flow) | string | OAuth 授权端点地址,用于获取用户授权 |
| token_endpoint | ✅ 是(除非只支持 implicit) | string | Token 端点,客户端在此获取 access token |
| jwks_uri | ⛔ 可选 | string | JWK Set 的地址,包含公钥供客户端验证 JWT 签名 |
| registration_endpoint | ⛔ 可选 | string | 支持动态客户端注册时用于注册客户端的端点 |
| scopes_supported | ⛔ 推荐 | array | 支持的 scope 列表 |
| response_types_supported | ✅ 是 | array | 支持的响应类型,如 code、token |
| response_modes_supported | ⛔ 可选 | array | 支持的 response mode,如 query、fragment、form_post |
| grant_types_supported | ⛔ 可选 | array | 支持的授权类型,如 authorization_code、client_credentials |
| token_endpoint_auth_methods_supported | ⛔ 可选 | array | token endpoint 支持的客户端认证方式,如 client_secret_basic |
| token_endpoint_auth_signing_alg_values_supported | ⛔ 可选 | array | token endpoint 使用 JWT 认证时支持的签名算法,如 RS256 |
| service_documentation | ⛔ 可选 | string | 开发者文档地址 |
| ui_locales_supported | ⛔ 可选 | array | UI 支持的语言列表(如 zh-CN) |
| op_policy_uri | ⛔ 可选 | string | 授权服务器对客户端使用数据的策略说明 URL |
| op_tos_uri | ⛔ 可选 | string | 服务条款 URL |
| revocation_endpoint | ⛔ 可选 | string | token 撤销端点(见 RFC 7009) |
| revocation_endpoint_auth_methods_supported | ⛔ 可选 | array | revocation endpoint 支持的认证方式 |
| revocation_endpoint_auth_signing_alg_values_supported | ⛔ 可选 | array | revocation endpoint 支持的 JWT 签名算法 |
| introspection_endpoint | ⛔ 可选 | string | token 状态检查端点(见 RFC 7662) |
| introspection_endpoint_auth_methods_supported | ⛔ 可选 | array | introspection endpoint 支持的认证方式 |
| introspection_endpoint_auth_signing_alg_values_supported | ⛔ 可选 | array | introspection endpoint 支持的 JWT 签名算法 |
| code_challenge_methods_supported | ⛔ 可选 | array | 支持的 PKCE code_challenge_method(如 S256) |
另外服务商还可以增加自定义字段
OAuth 2.0 Dynamic Client Registration Protocol - RFC 7591
之前注册获得ClientID的步骤是手动的,这个RFC本质上就是让客户端可以自动注册自身拿到ClientID和ClientSecret,而不需要人为提前注册
注册示例
POST /register HTTP/1.1
Host: server.example.com
Content-Type: application/json

{
  "client_name": "AwesomeApp",
  "redirect_uris": [
    "https://awesome.example.com/oauth/callback"
  ],
  "grant_types": ["authorization_code", "refresh_token"],
  "response_types": ["code"],
  "scope": "read write",
  "token_endpoint_auth_method": "client_secret_basic"
}
可能会返回
{
  "client_id": "s6BhdRkqt3",
  "client_secret": "7Fjfp0ZBr1KtDRbnfVdmIw",
  "registration_access_token": "access-token-123",
  "registration_client_uri": "https://server.example.com/register/s6BhdRkqt3",
  "client_id_issued_at": 1599389946,
  "client_secret_expires_at": 0
}
OAuth 2.1
对OAuth 2.0进行修订,而不是完全重写,主要差异:
- Implicit和Resource Owner Password Credentials方式因不安全被移除了
- 强制所有客户端都需要使用PKCE
- 推荐refresh token启用rotation(也就是刷新时会废弃旧的)
我觉得这里最重要的明显差异就是强制使用PKCE(Proof Key for Code Exchange),为了防止授权码被拦截重放而设计的机制,大体是:
- 客户端随机生成一串字符串,这串字符串就是code_verifier
- 将code_verifier进行SHA256哈希后Base64编码,就可以得到另外一串随机字符串,就是code_challenge
- 客户端请求的时候就可以发送code_challenge和对应的哈希算法code_challenge_method=S256
- 用户同意授权后,服务端记录code_challenge
- 客户端用authorization_code换token的时候,要带上原始的code_verifier
- 授权服务会对code_verifier哈希后对比,以确认是否接受请求
通过代码看看
import secrets
import hashlib
import base64

def generate_code_verifier(length=64):
    # PKCE 规范推荐长度在 43~128 字符之间
    return base64.urlsafe_b64encode(secrets.token_bytes(length)).rstrip(b'=').decode('utf-8')

def generate_code_challenge(code_verifier):
    code_verifier_bytes = code_verifier.encode('utf-8')
    sha256_digest = hashlib.sha256(code_verifier_bytes).digest()
    code_challenge = base64.urlsafe_b64encode(sha256_digest).rstrip(b'=').decode('utf-8')
    return code_challenge

# 示例
code_verifier = generate_code_verifier()
code_challenge = generate_code_challenge(code_verifier)

print("code_verifier:", code_verifier)
print("code_challenge:", code_challenge)
# code_verifier: 92Foogx4d9Q5cbDbmLrz7eCHfAxX06q-6FHhmyKQ0OMcGpRbu6CWzknxCUSuvJ6b5-D_dIaJB5mHfAIfk_Qu1A
# code_challenge: GFc8vy-W93jTehp7I3Fvzma2DH5JNjnRAoktZuHtywA
所以类似的请求是
# 发起是授权请求
GET /authorize?
  response_type=code&
  client_id=abc123&
  redirect_uri=https://client.example.com/cb&
  code_challenge=E9Melhoa2OwvFrEMTJguCHaoeK1t8URWbuGJSstw-cM&
  code_challenge_method=S256&
  state=xyz

# 换取token
POST /token
Content-Type: application/x-www-form-urlencoded

grant_type=authorization_code&
code=SplxlOBeZQQYbYS6WxSbIA&
redirect_uri=https://client.example.com/cb&
client_id=abc123&
code_verifier=dBjftJeZ4CVP-mB92K27uhbUJU1p1r_wW1gFWFOEjXk
实操案例
GitHub配置OAuth APP
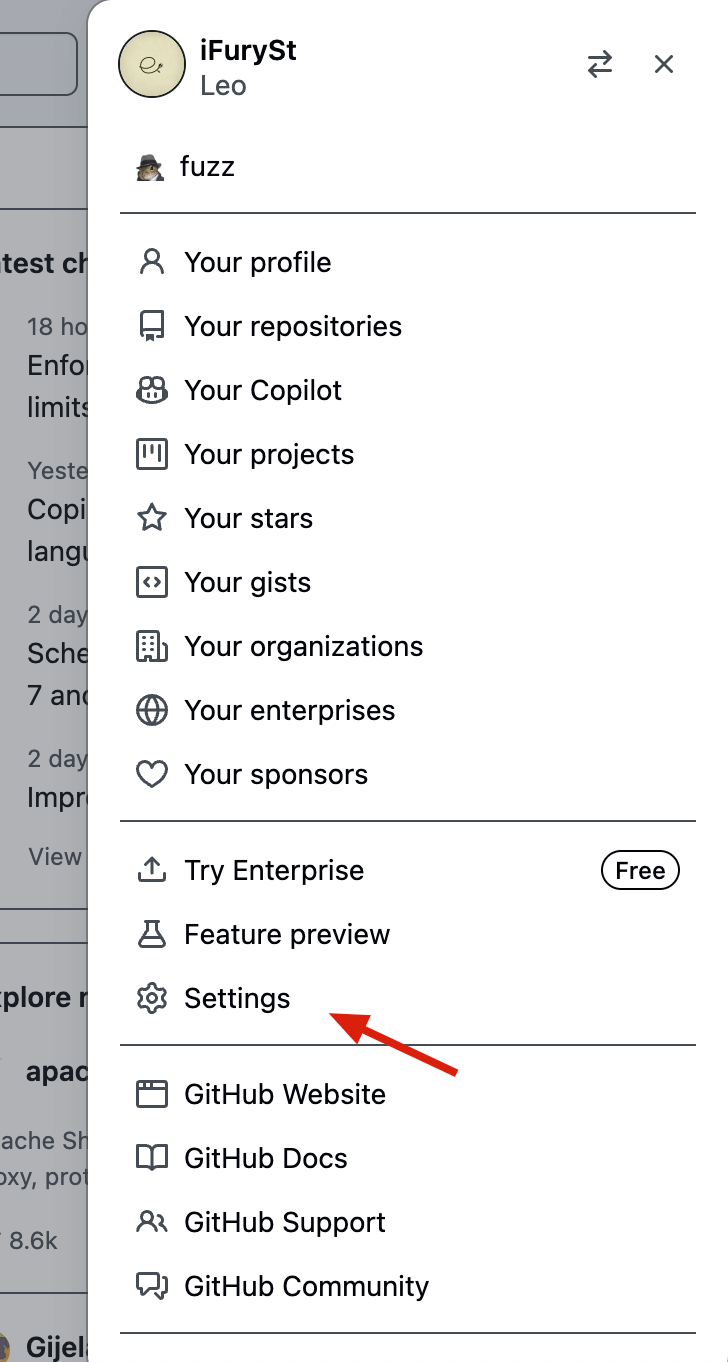
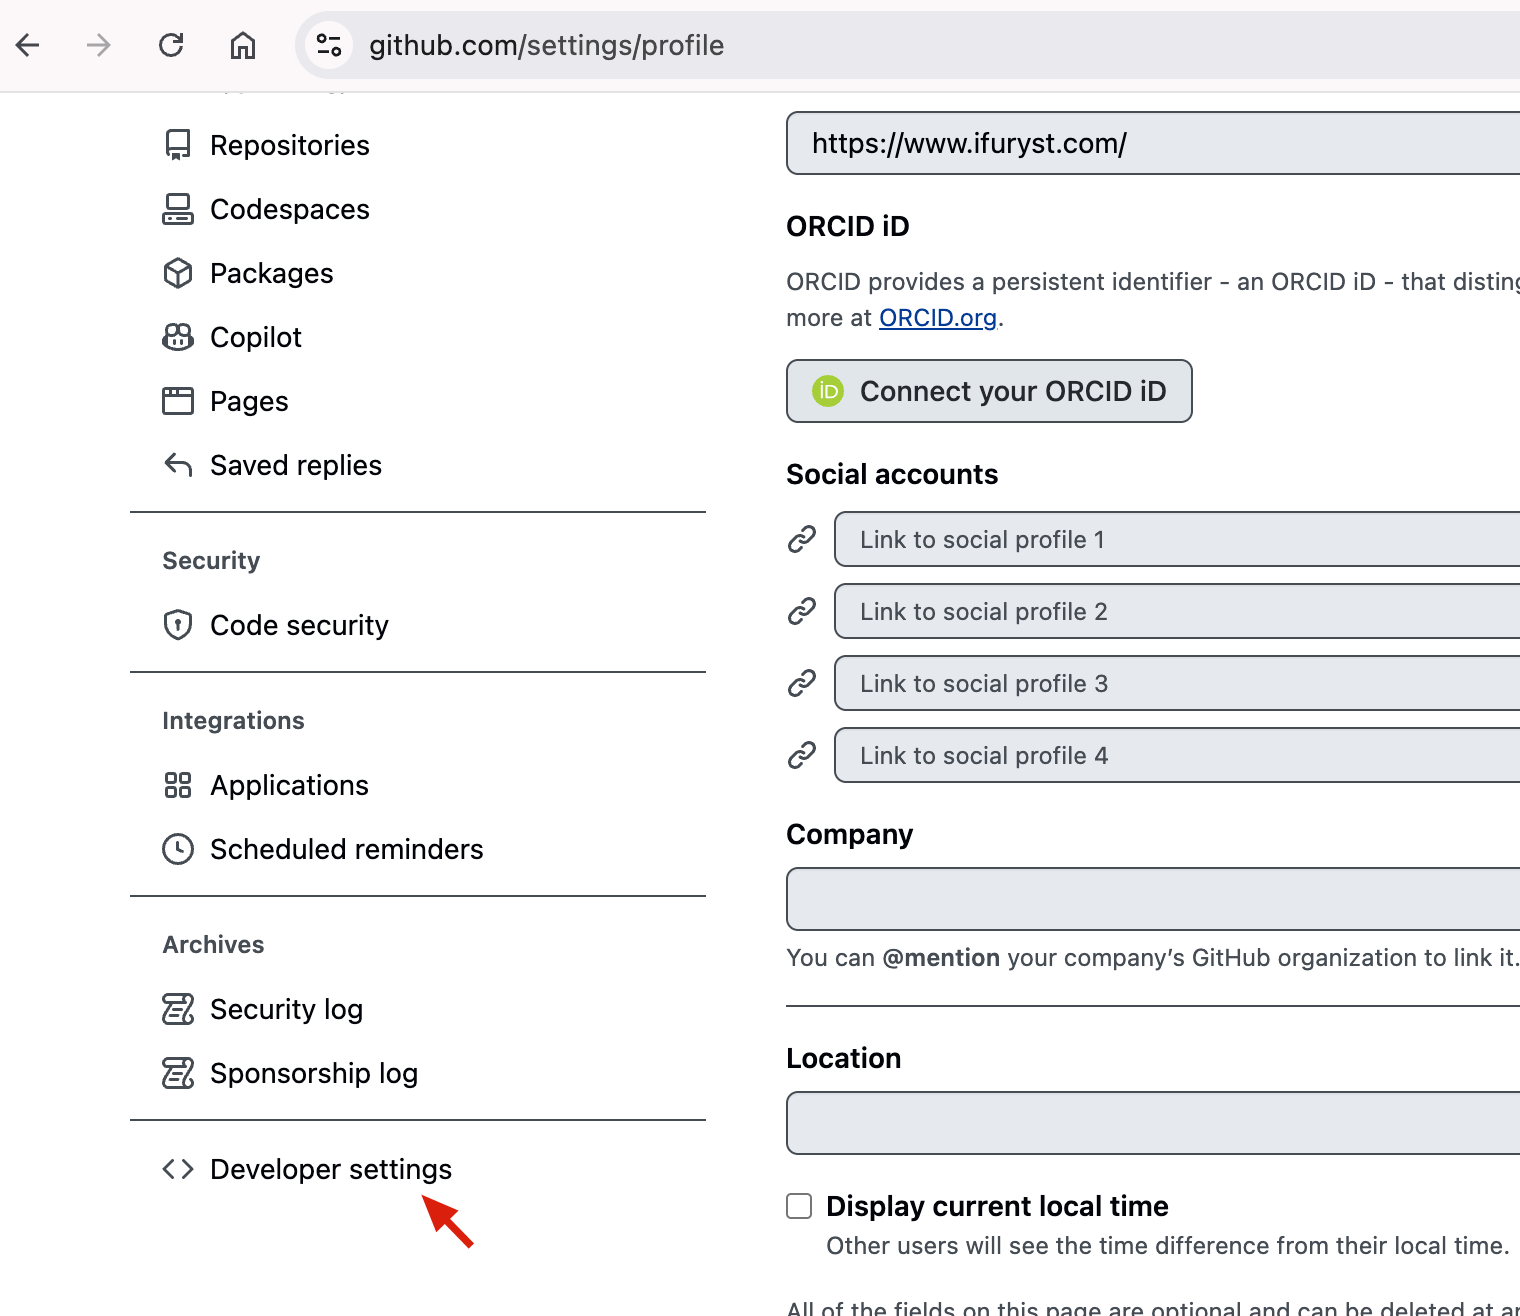
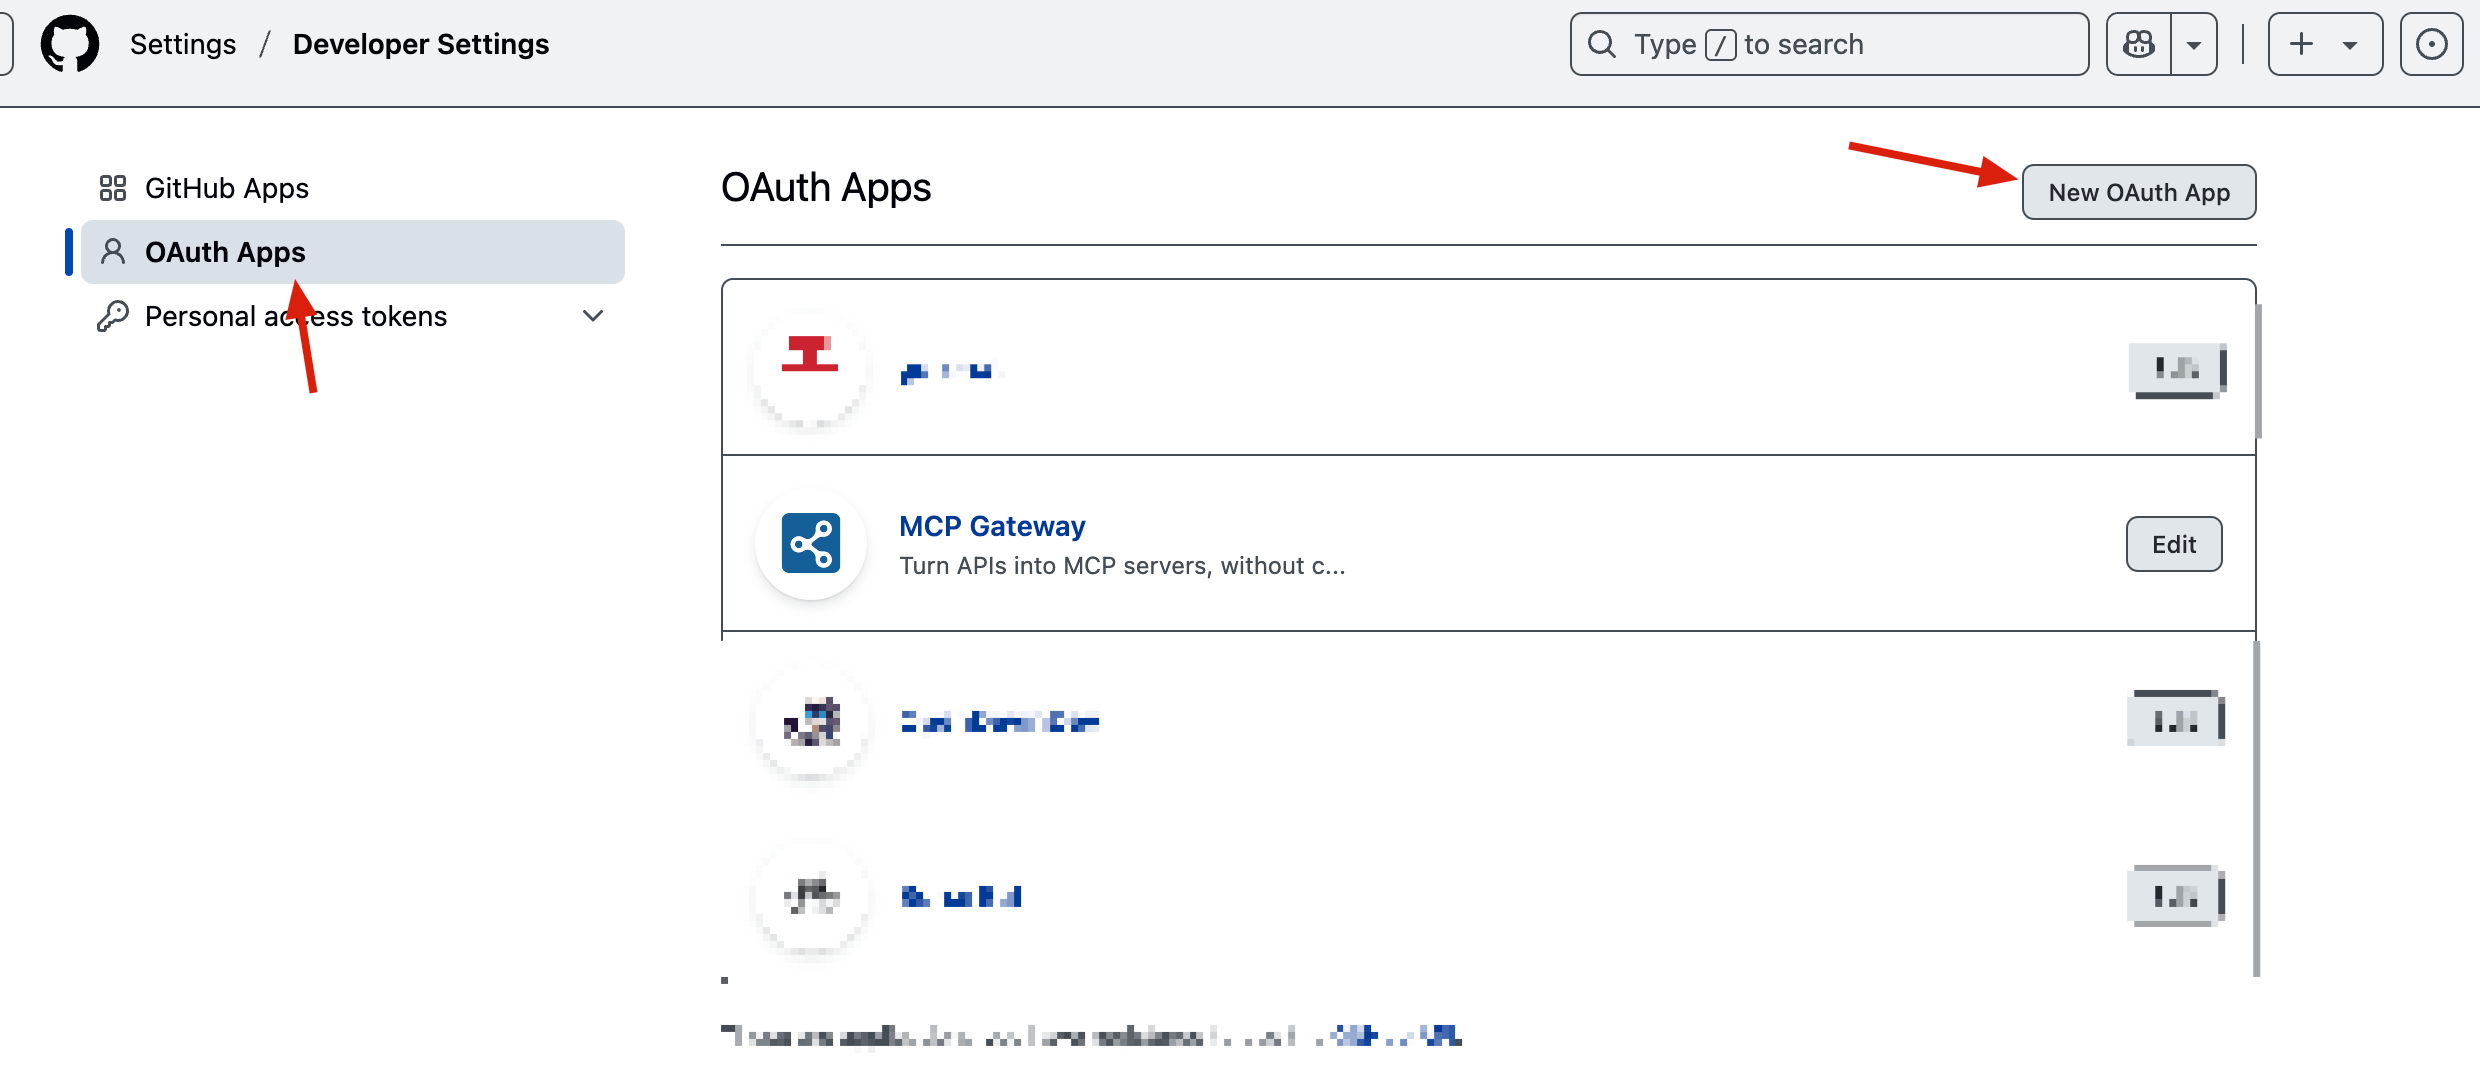
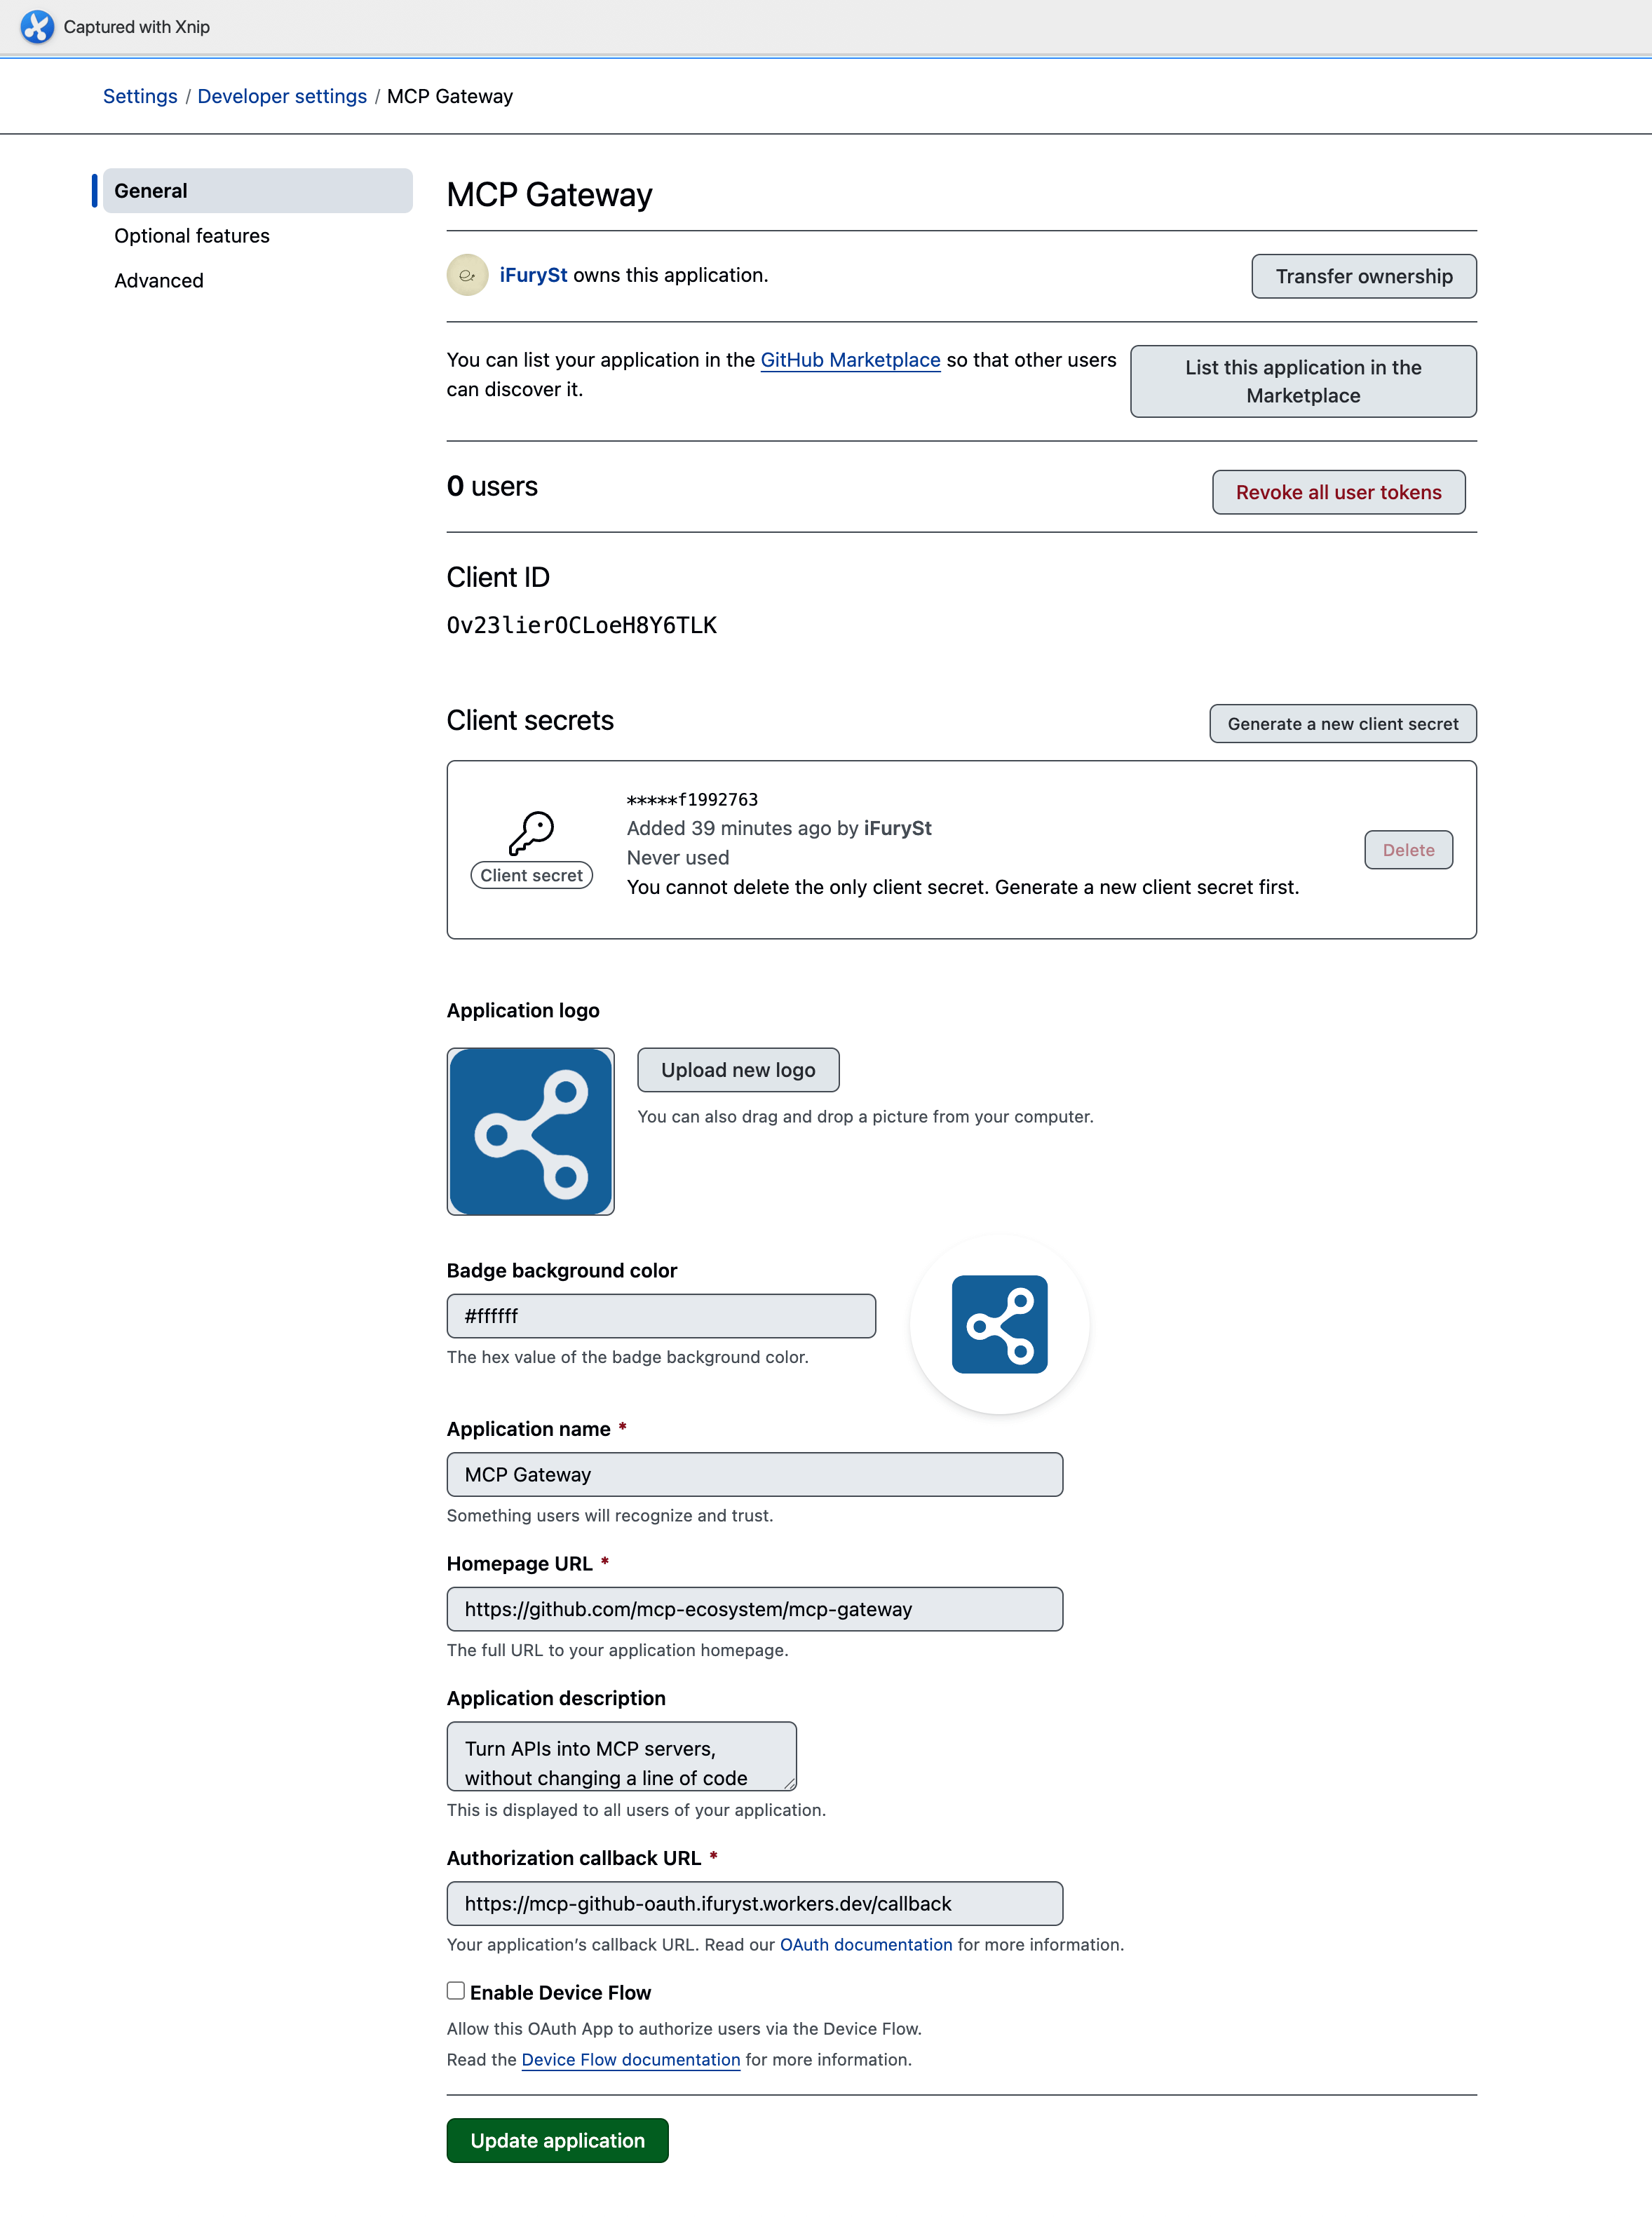
按照上面截图方式配置,最后得到对应的Client ID和Client Secret
CF Worker部署
参考这里https://github.com/cloudflare/ai/tree/main/demos/remote-mcp-github-oauth
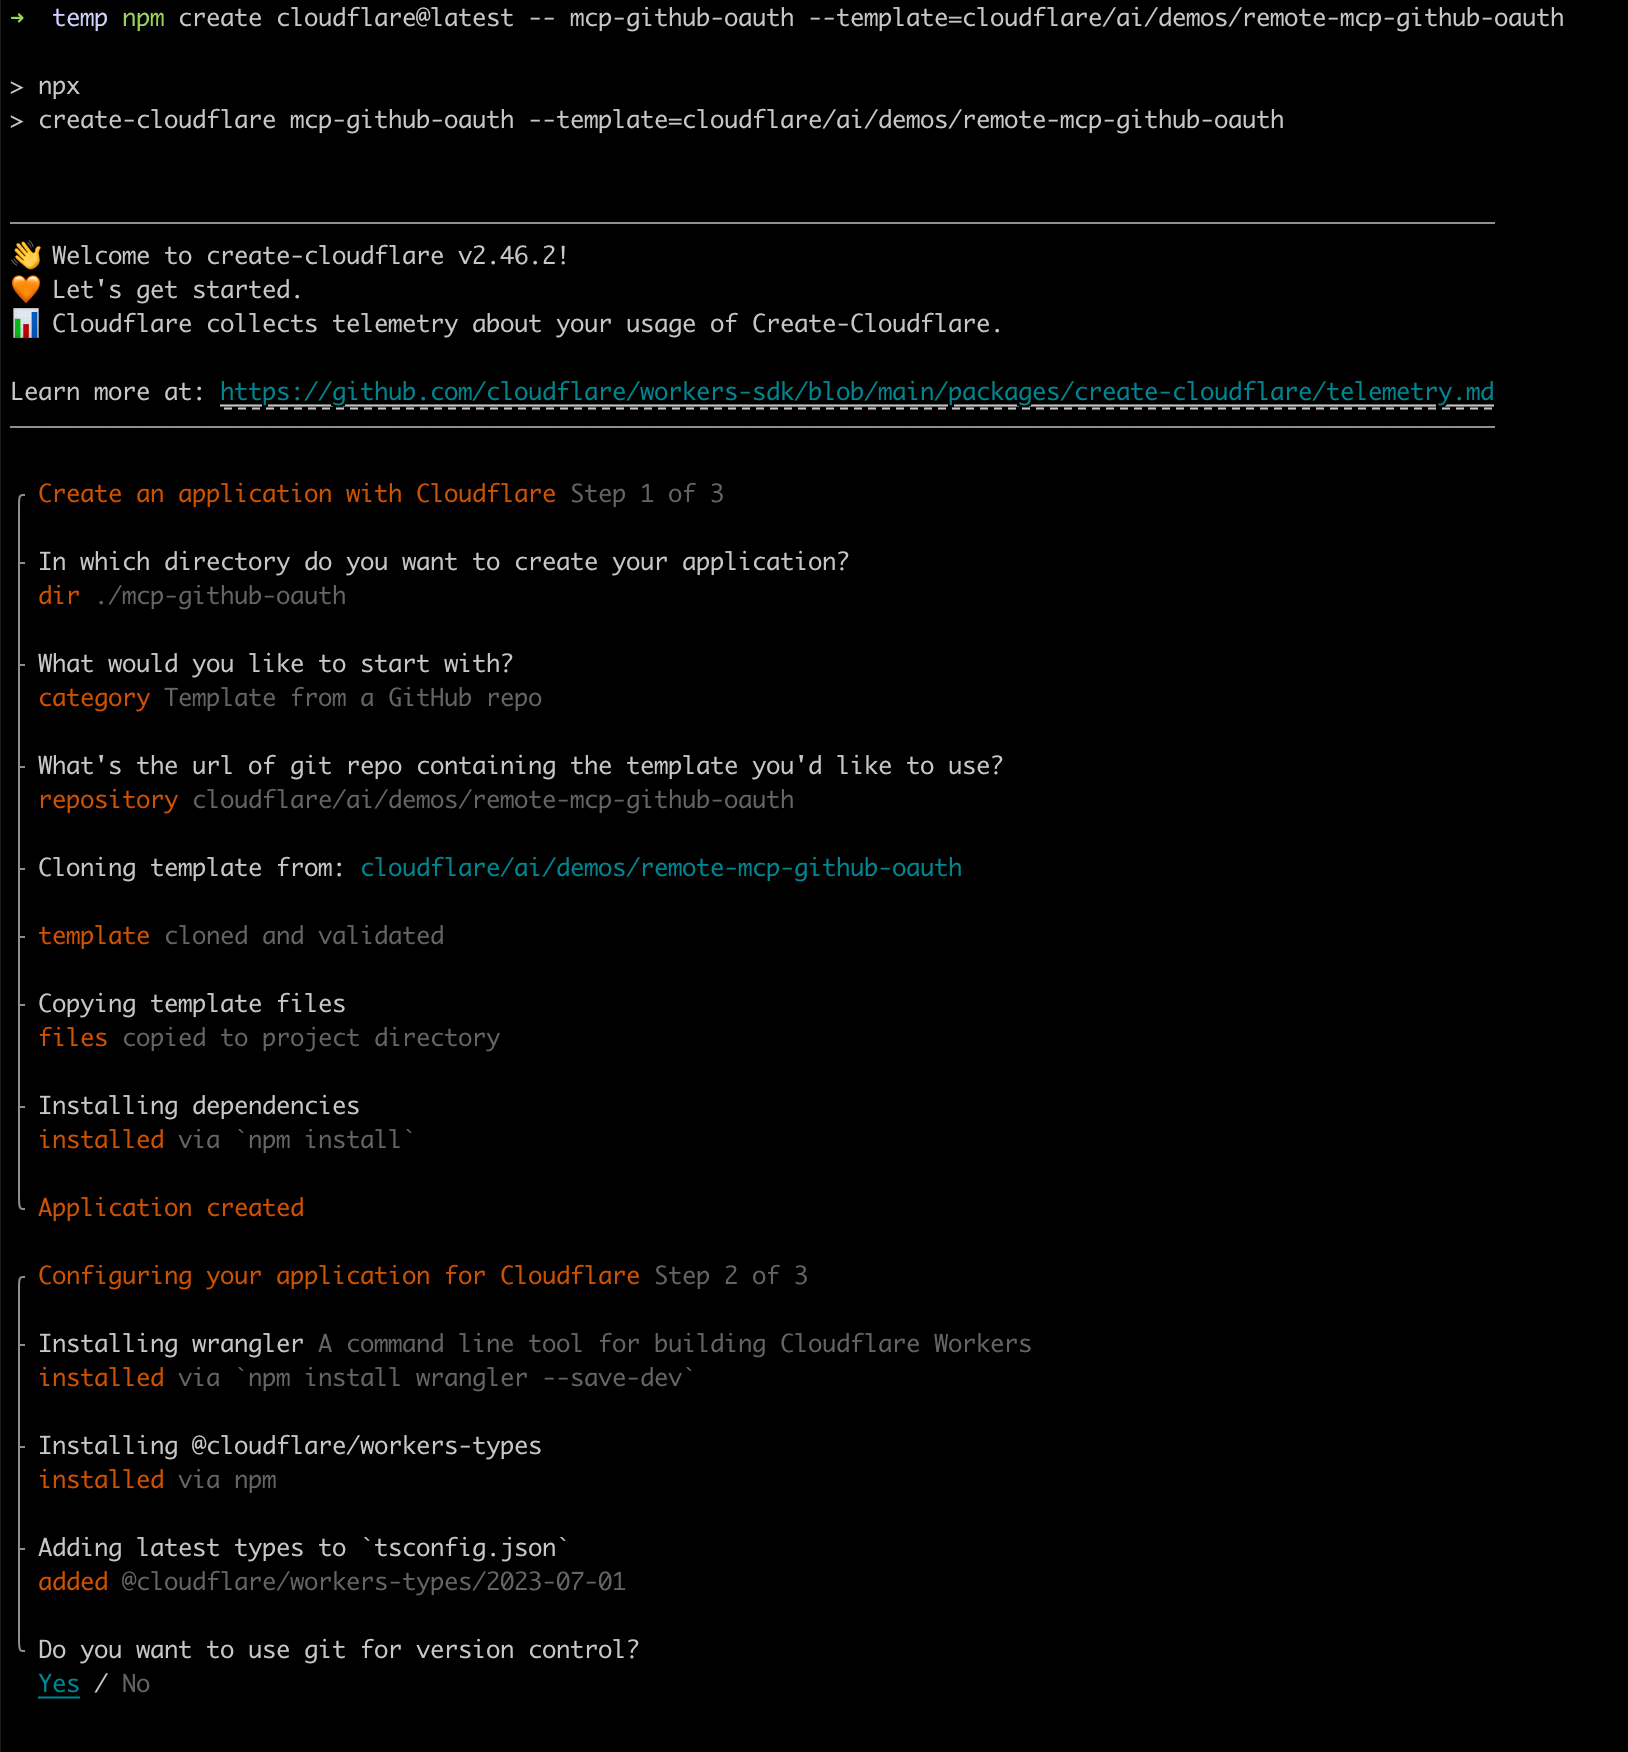
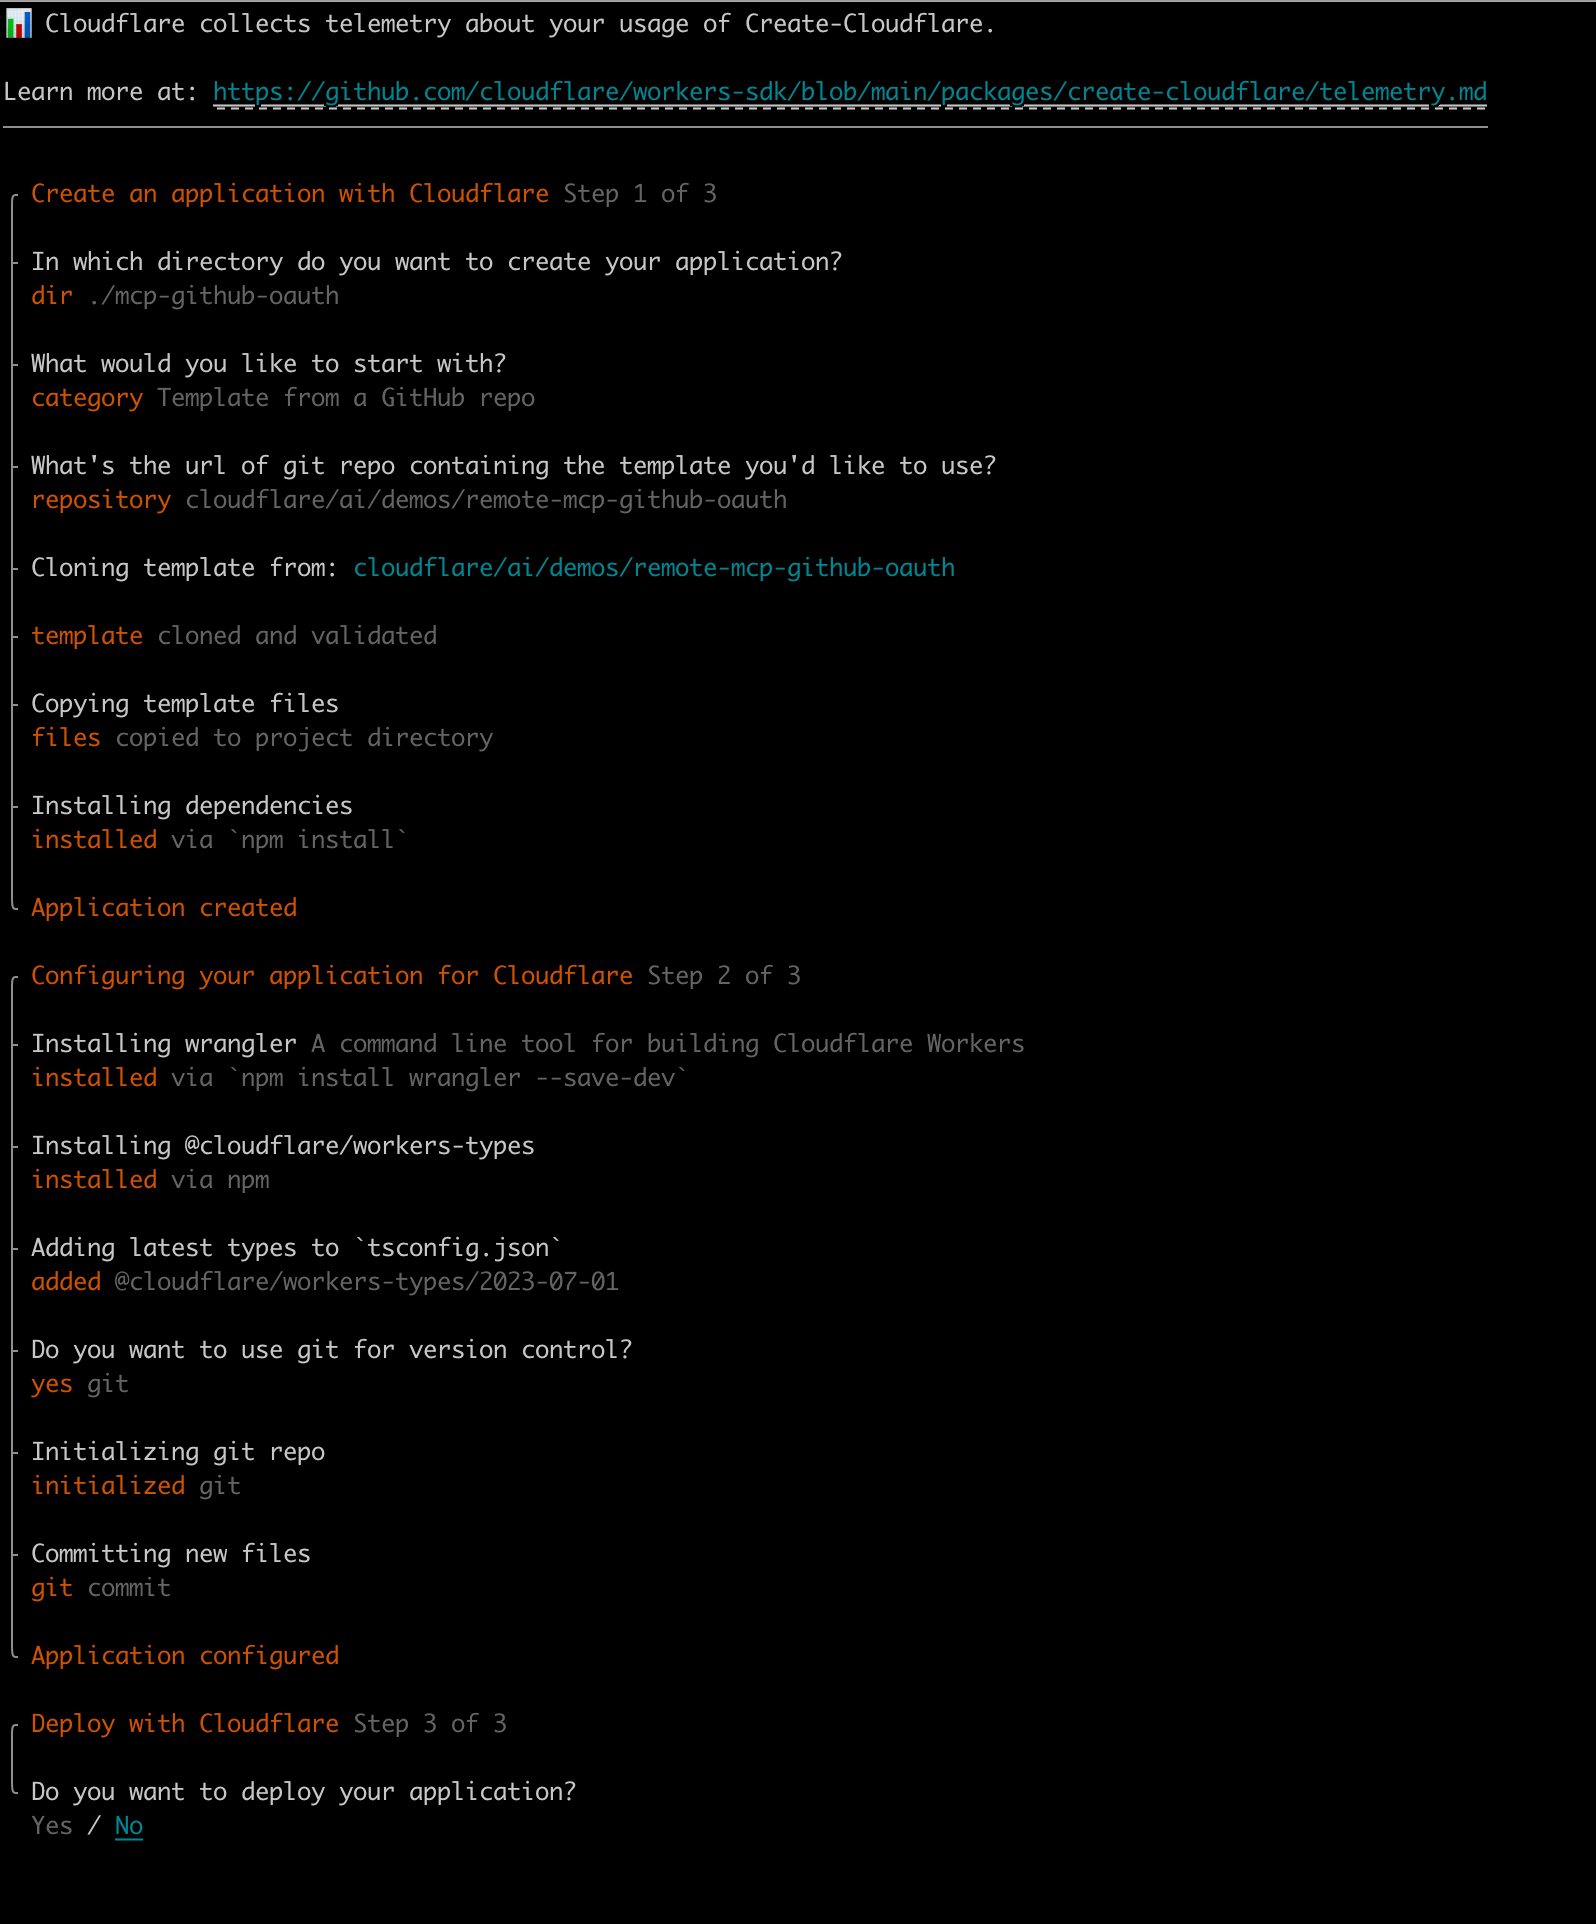
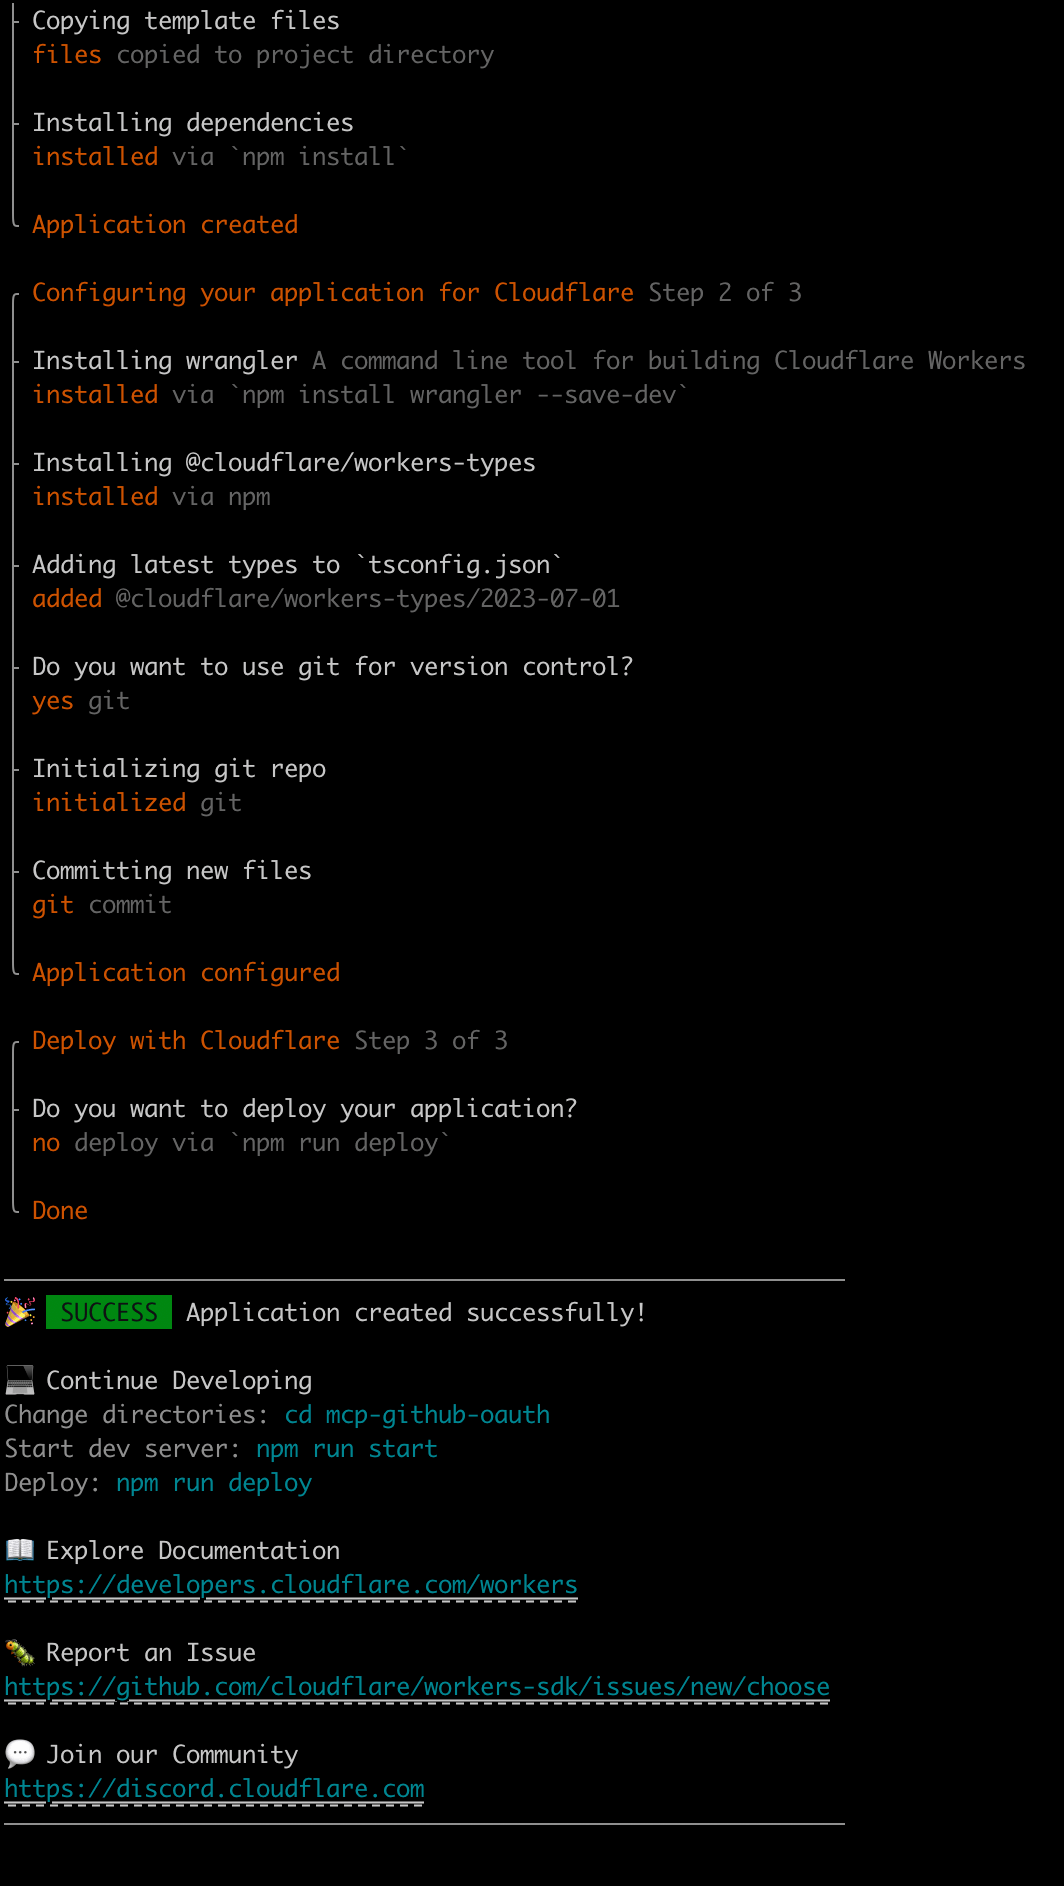
# 1. 初始化项目,前两步yes,最后no,因为还没配置也deploy不上去
npm create cloudflare@latest -- mcp-github-oauth --template=cloudflare/ai/demos/remote-mcp-github-oauth
# 2. 安装wrangler
npm install -g wrangler
# 3. 配置client id 和 client secret
cd mcp-github-oauth
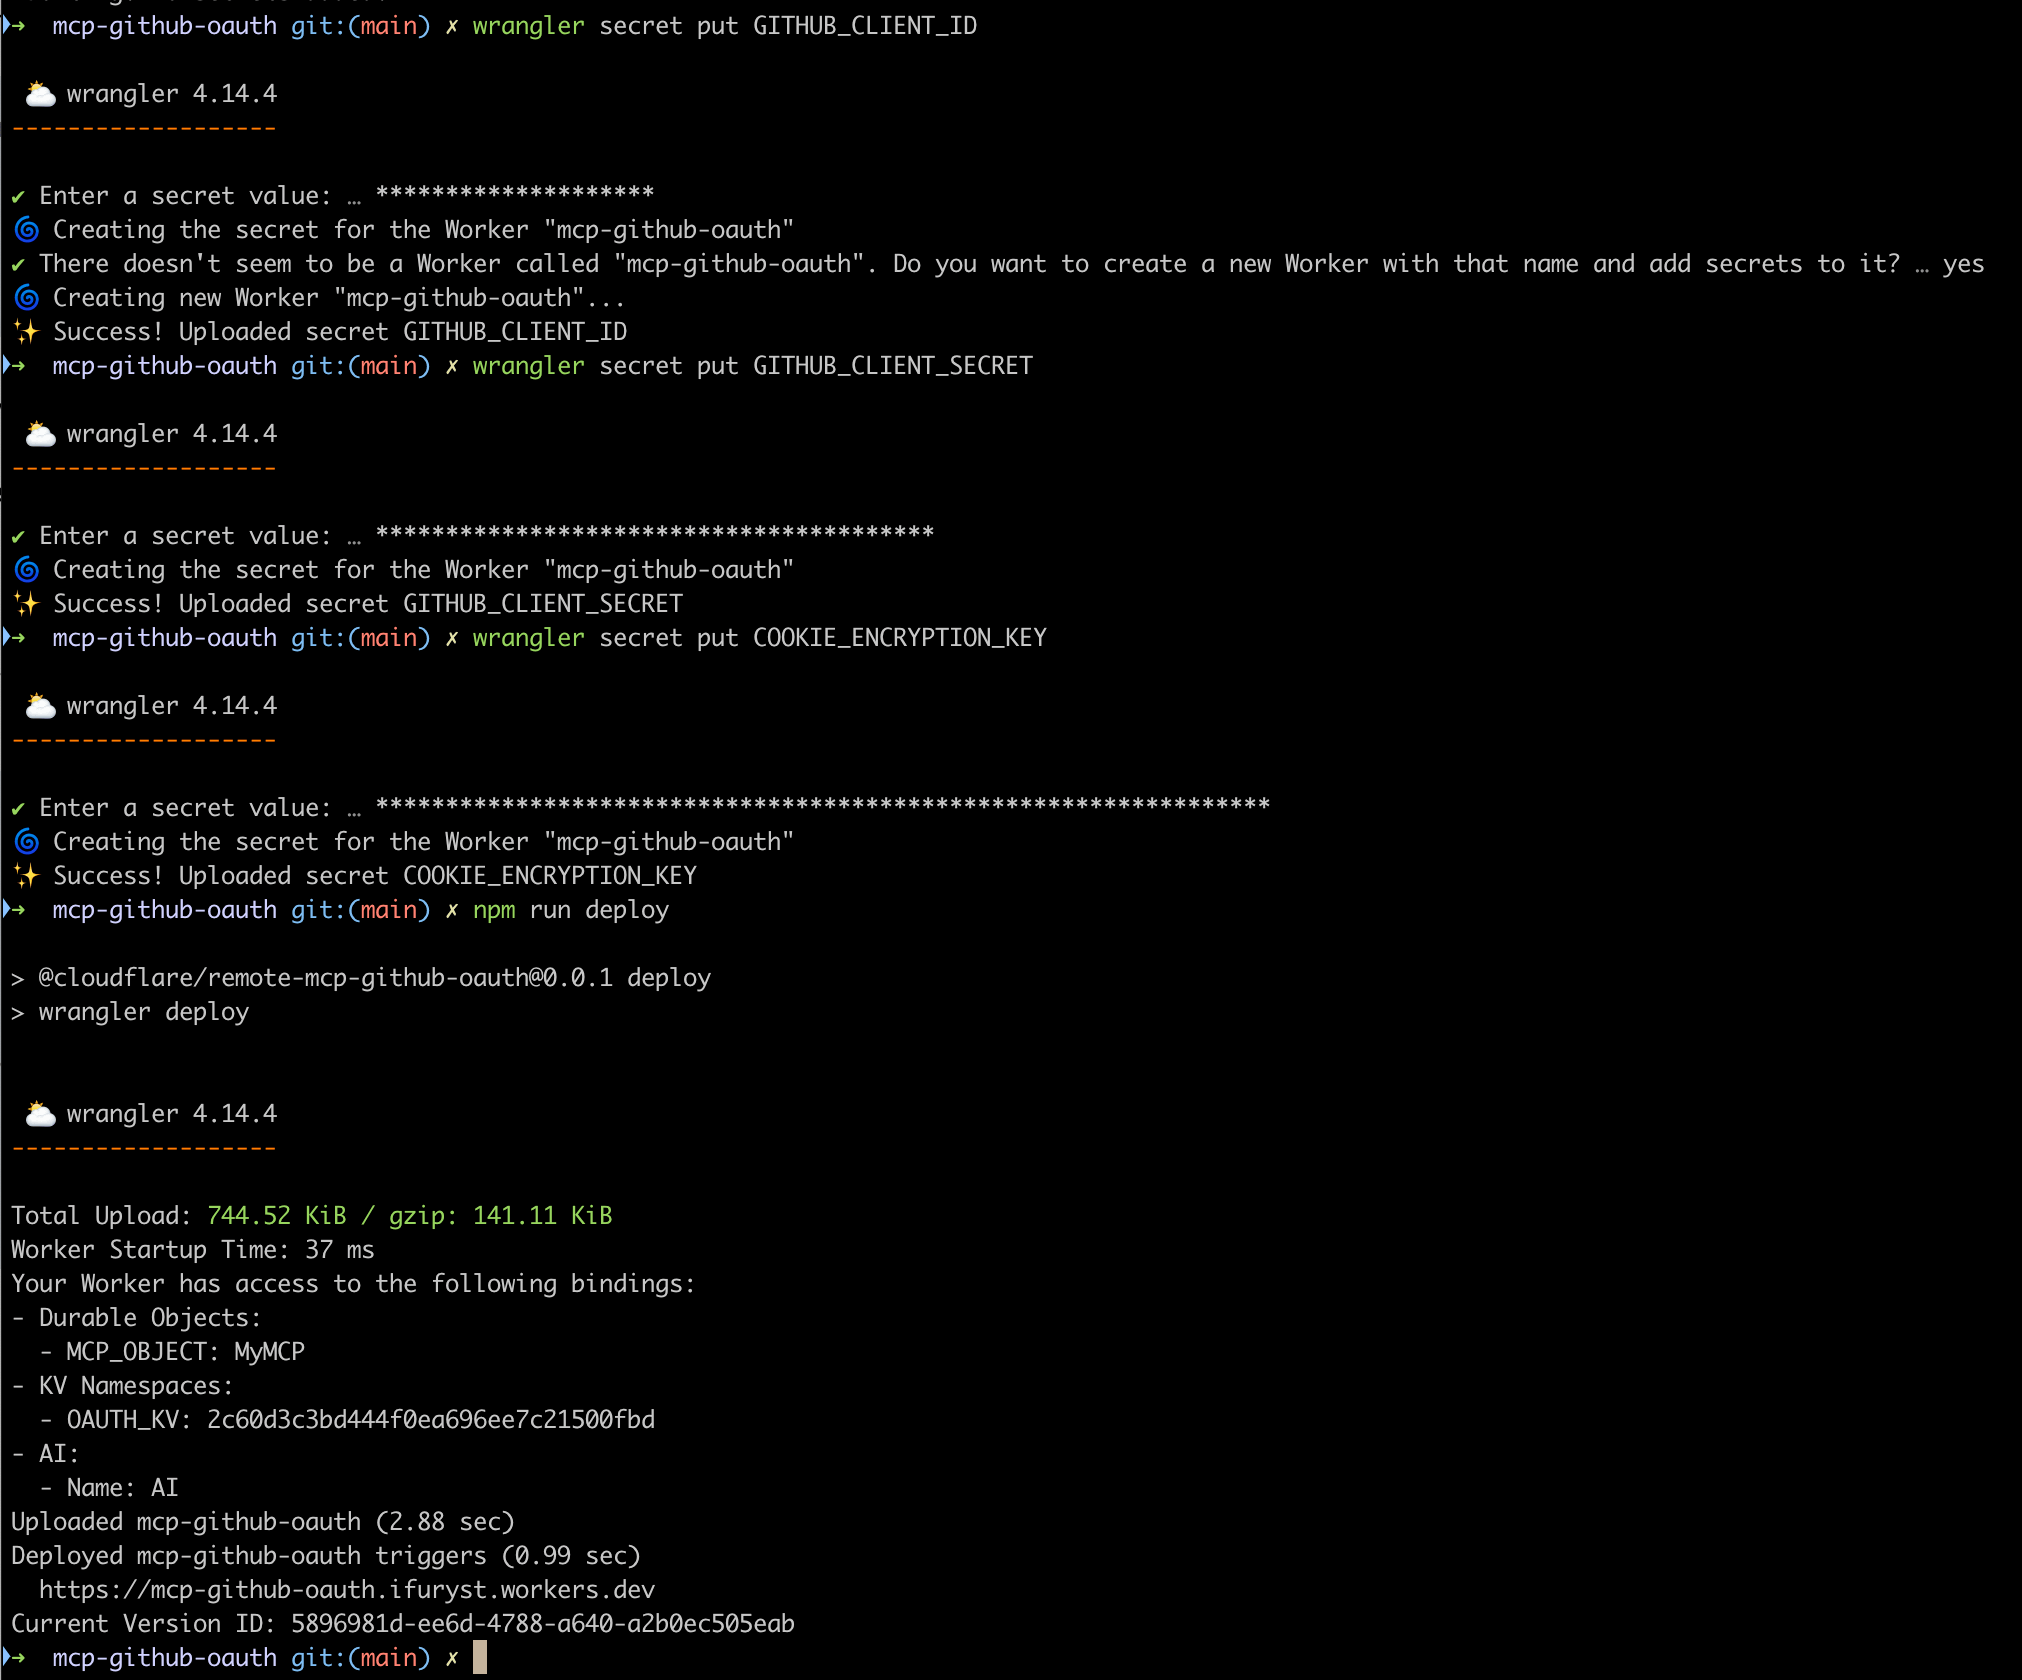
wrangler secret put GITHUB_CLIENT_ID
# 输入GitHub Client ID,然后y
wrangler secret put GITHUB_CLIENT_SECRET
# 输入GitHub Client Secret
wrangler secret put COOKIE_ENCRYPTION_KEY
# 输入随机字符串,可以用openssl rand -hex 32
# 4. 设置KV命名空间
wrangler kv:namespace create "OAUTH_KV"
# 会生成对应的id,拷贝写到wrangler.jsonrc文件里的
	"kv_namespaces": [
		{
			"binding": "OAUTH_KV",
			"id": "abc123"
		}
	],
# 5. 部署到Wroker,这里会跳到浏览器登录之类的操作,最后选择好用户就可以上传
npm run deploy
相关操作截图如下
测试
现在支持MCP认证的客户端比较少,cursor目前也没计划支持,我们用官方的inspector来测试
npx @modelcontextprotocol/inspector@latest
通过SSE来连接,比如 https://mcp-github-oauth.ifuryst.workers.dev/sse(注意:这是一个演示链接,可能已经失效)
大体流程是:连接后因为没有认证授权所以会返回401,这个时候MCP Client会根据MCP Servers暴露的Server Metadata Discovery(在 https://mcp-github-oauth.ifuryst.workers.dev/.well-known/oauth-authorization-server,演示链接可能已失效)去发现认证的信息,然后跳转到对应的地址去做认证。这里会先到CF Worker上部署的这个服务的页面,然后点击确认后会跳到GitHub做实际的认证,最后跳回MCP Client的callback接口,通常是 /oauth/callback,比如Inspector这里是 http://127.0.0.1:6274/oauth/callback

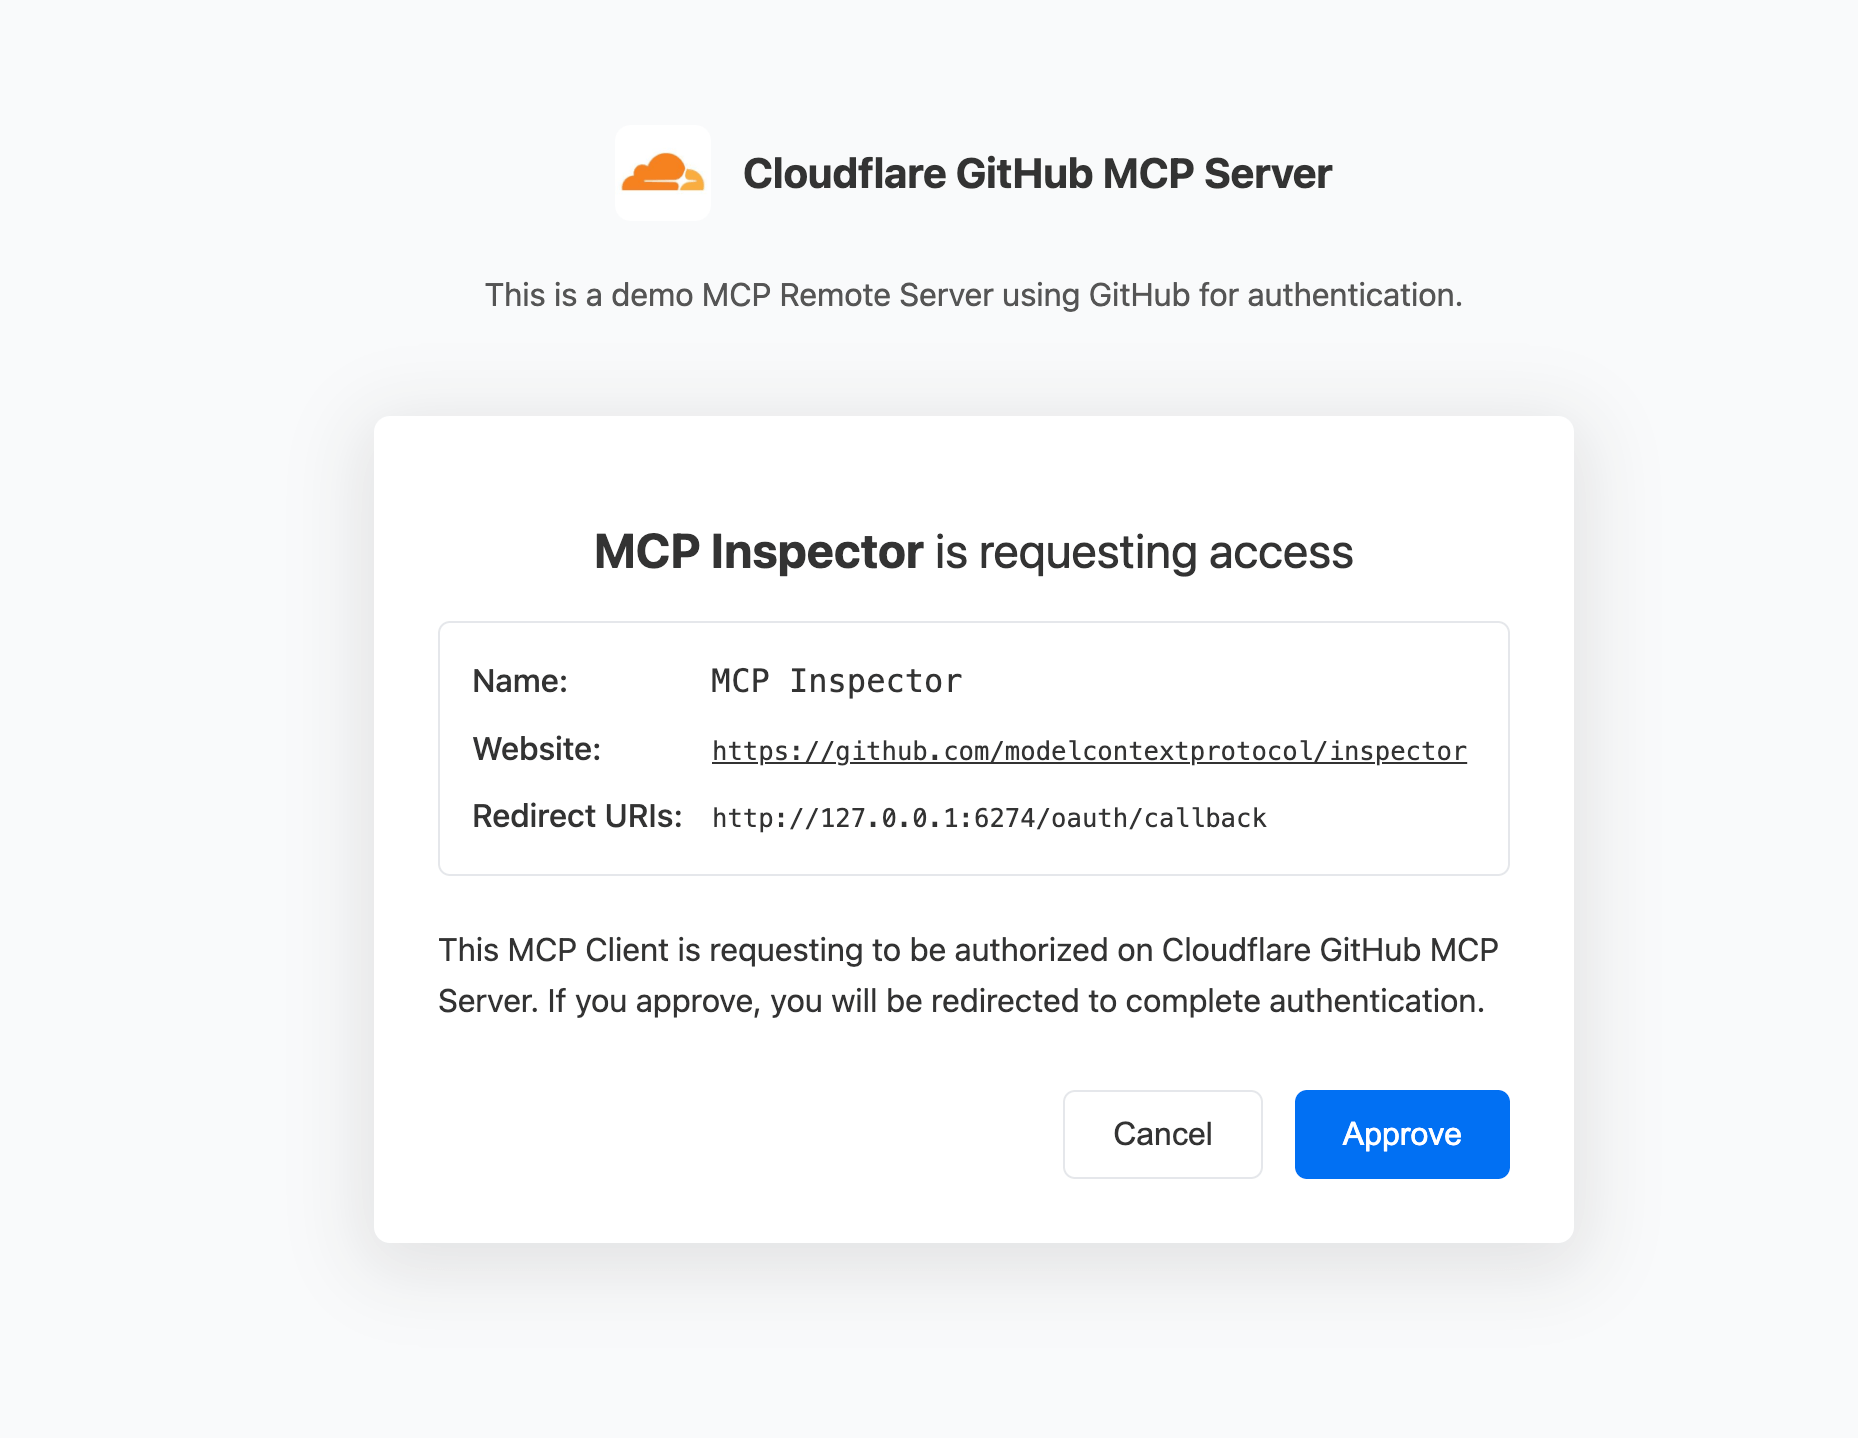
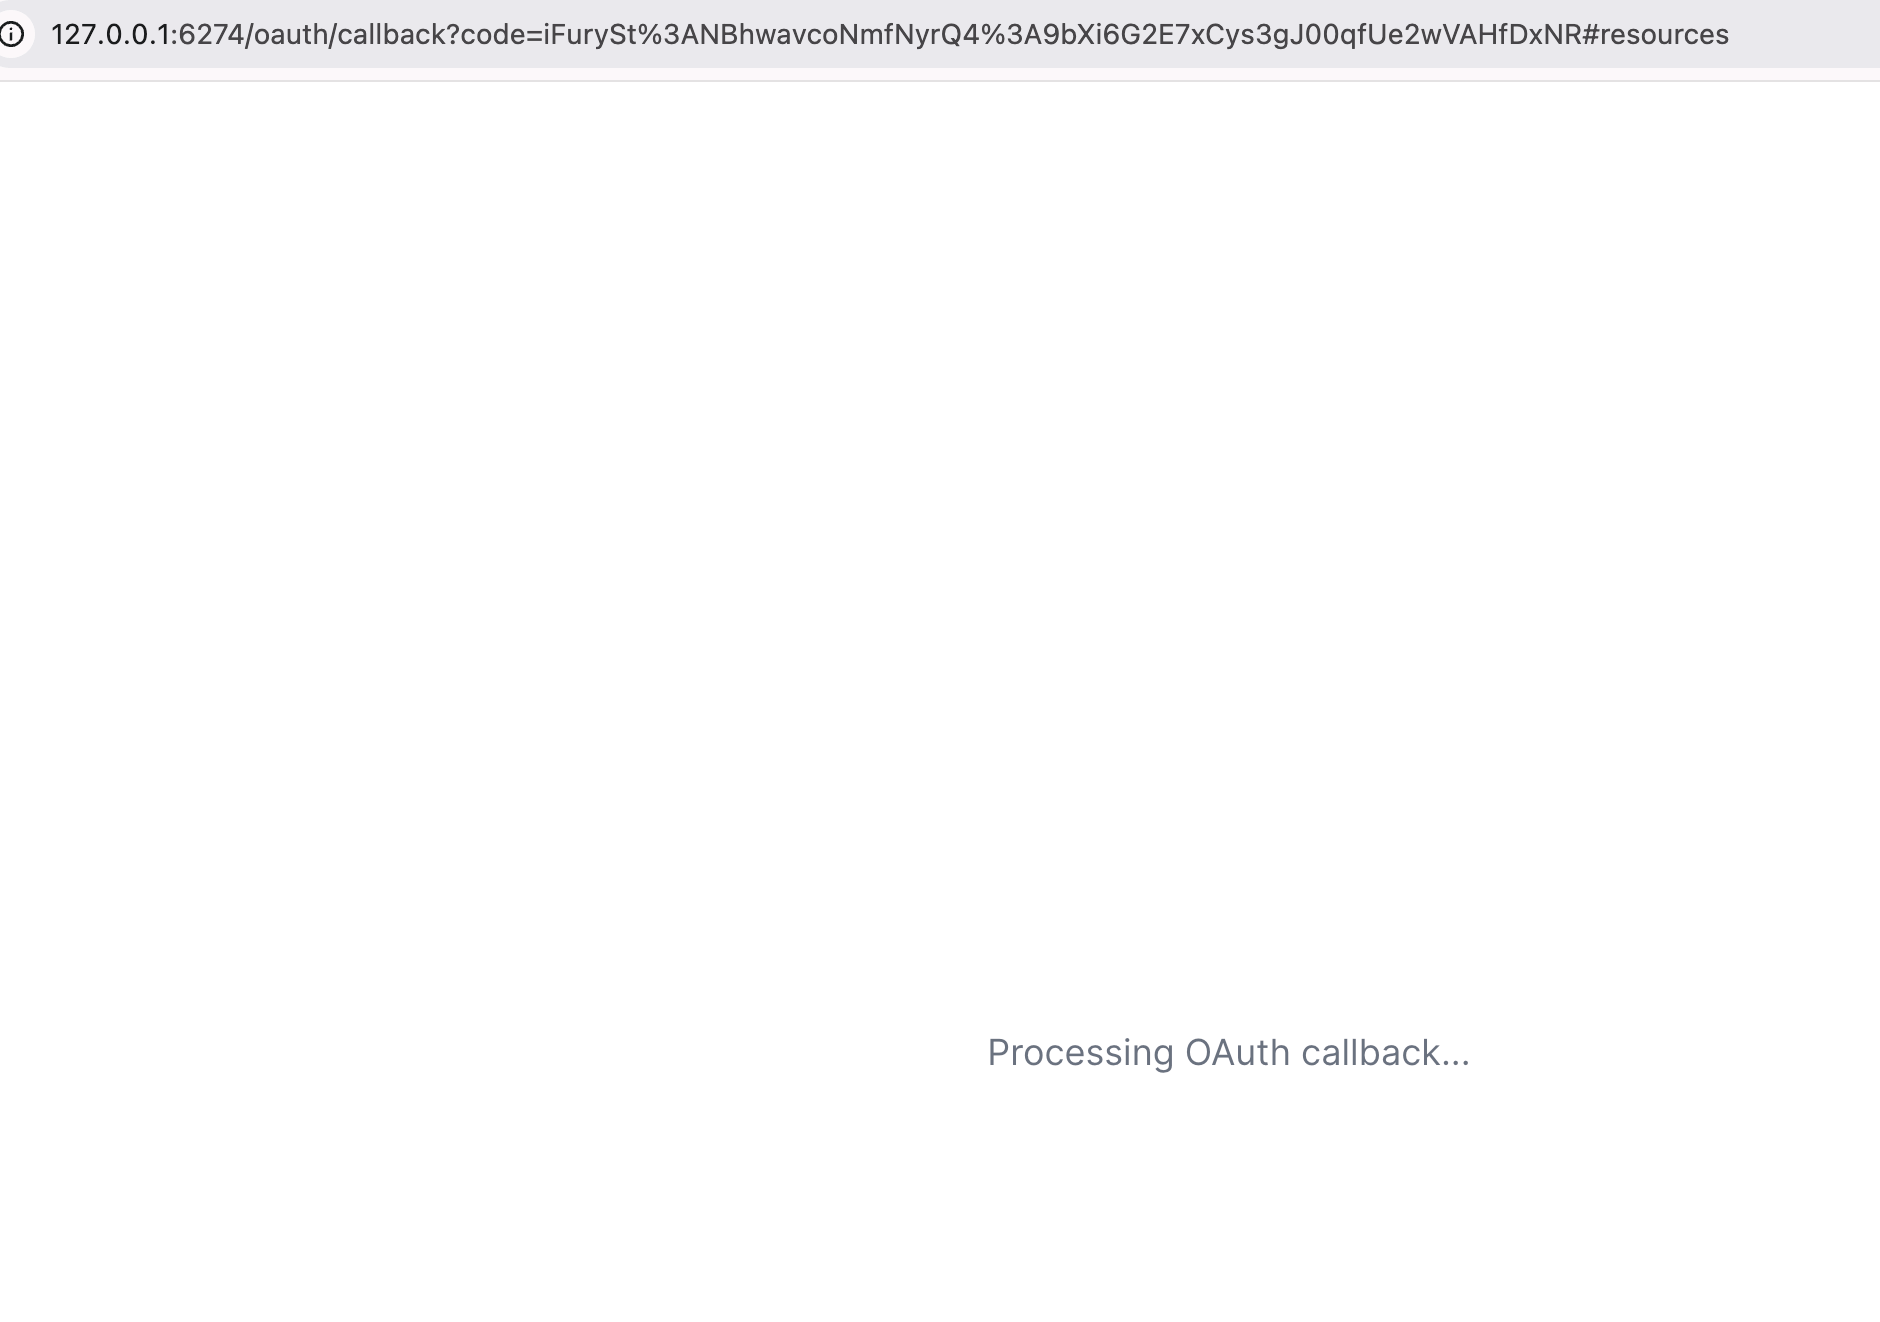
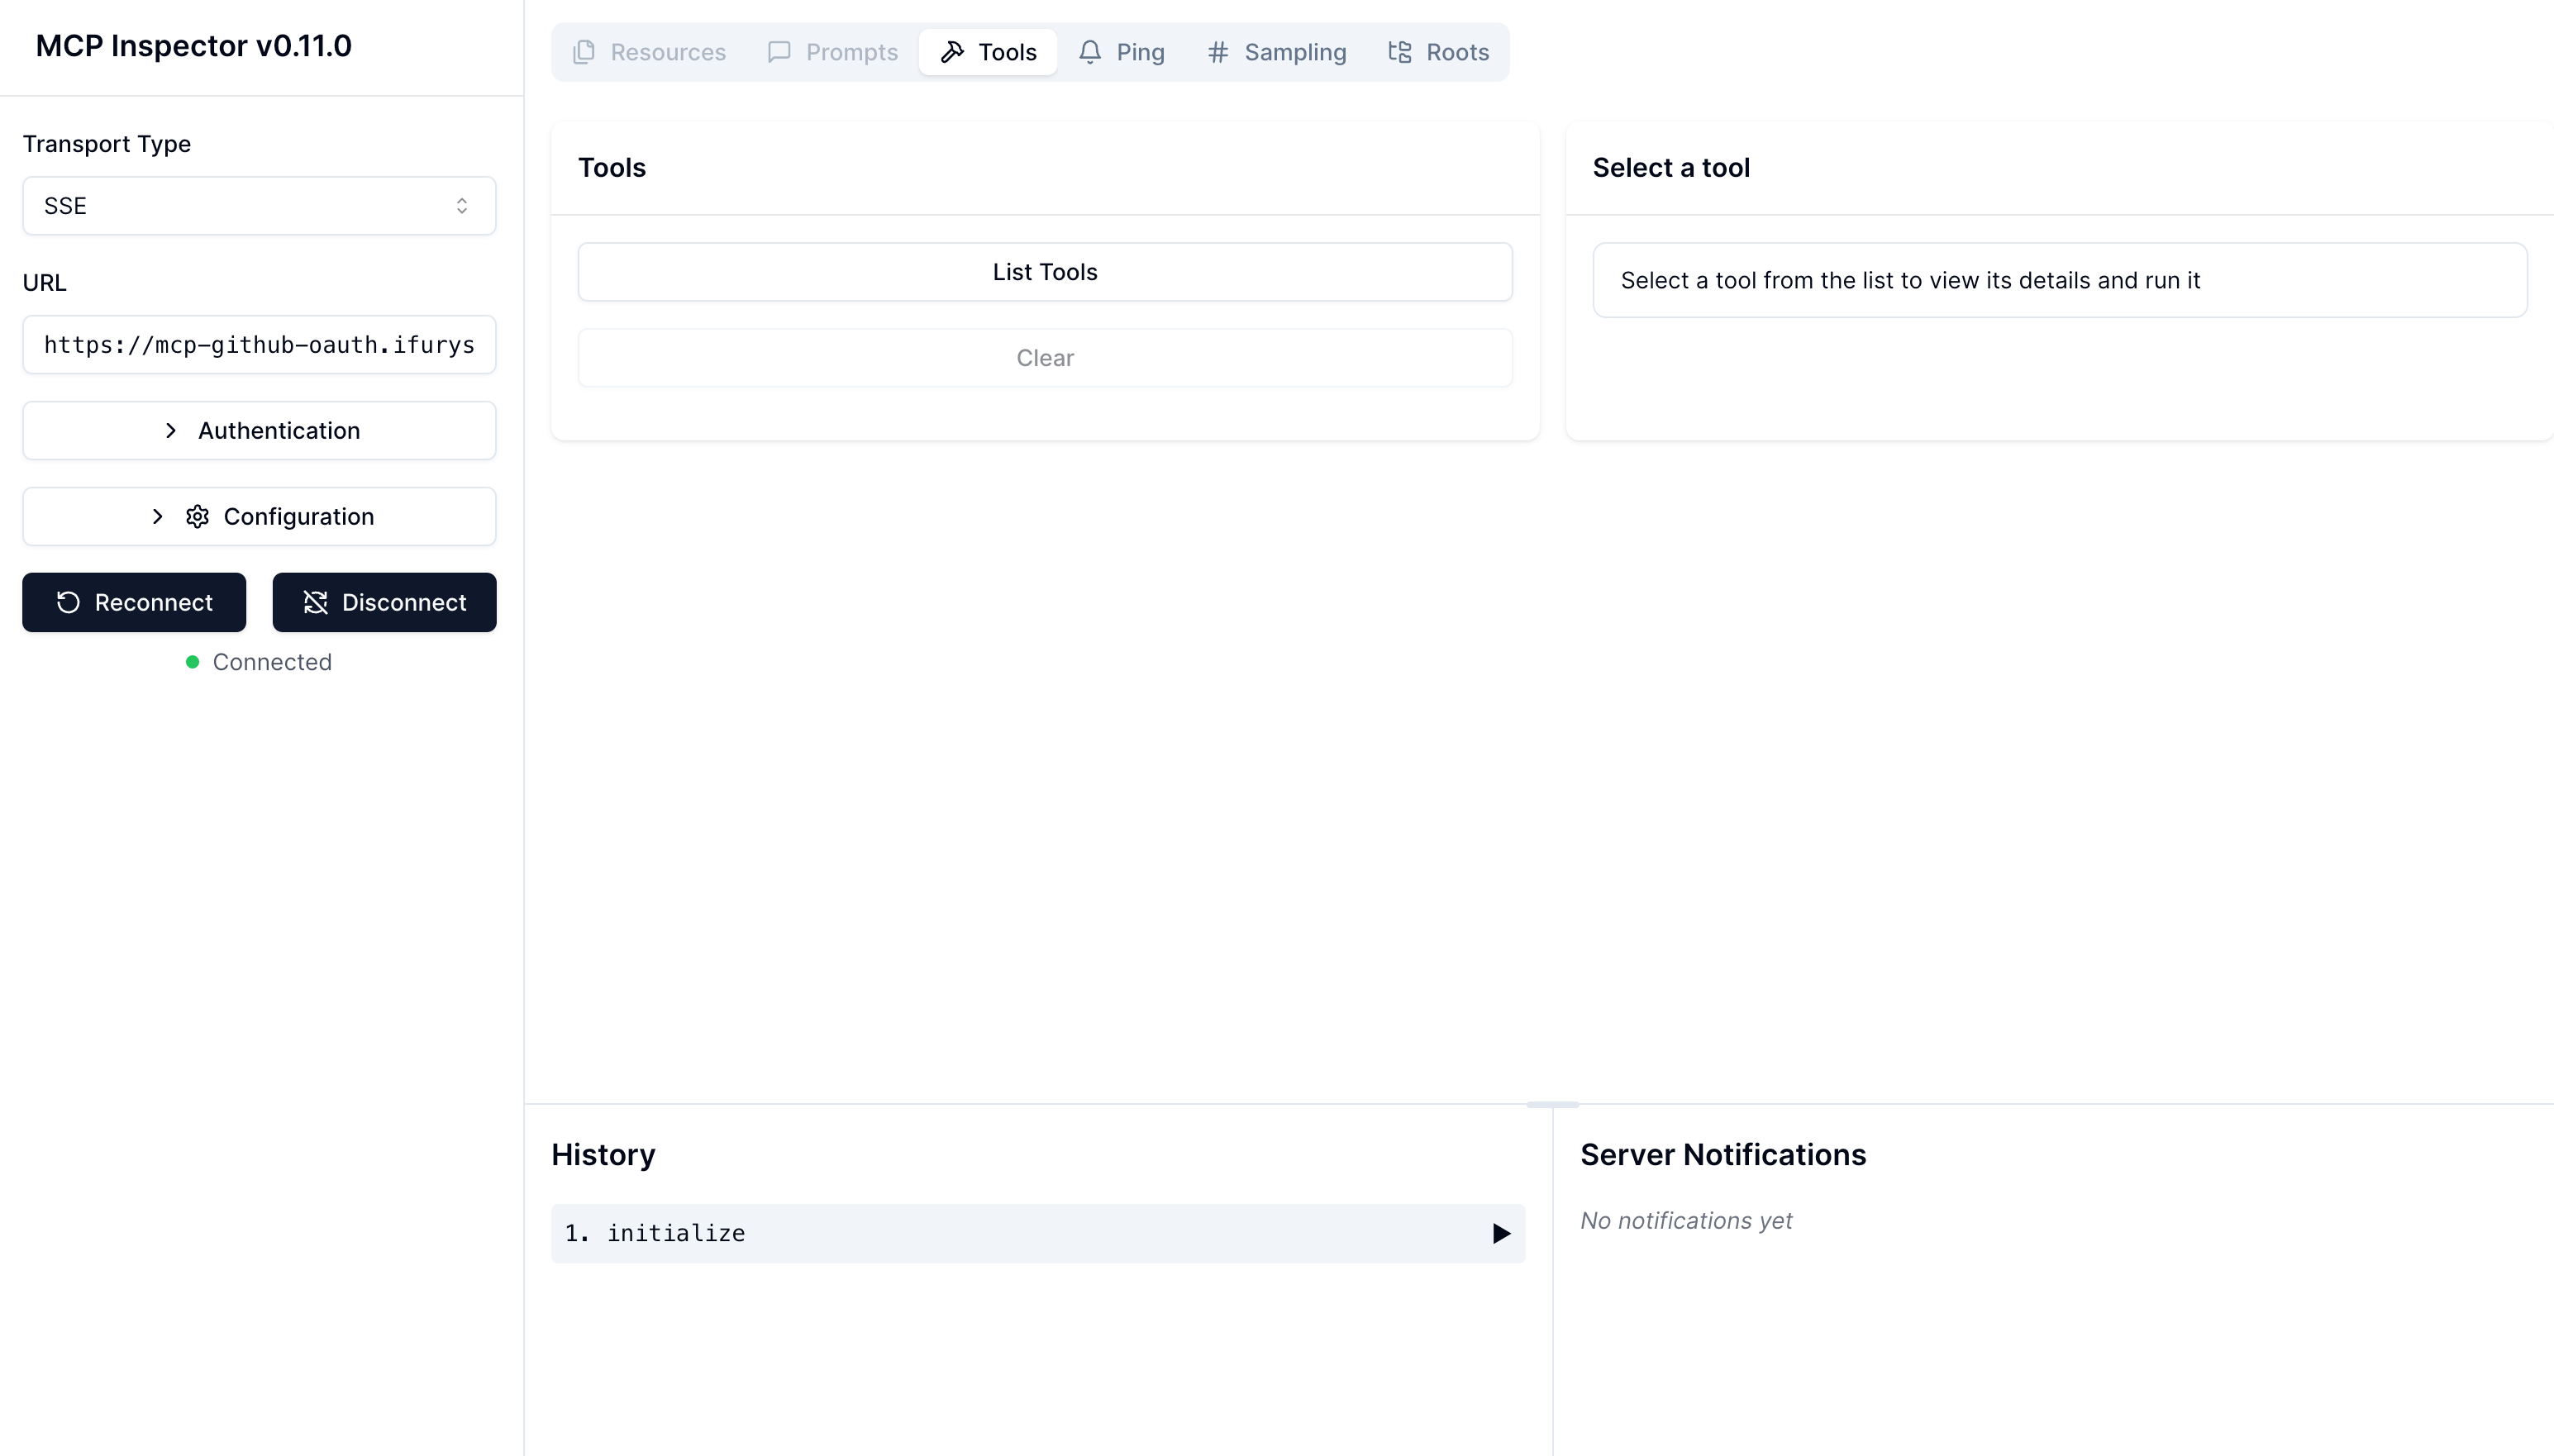
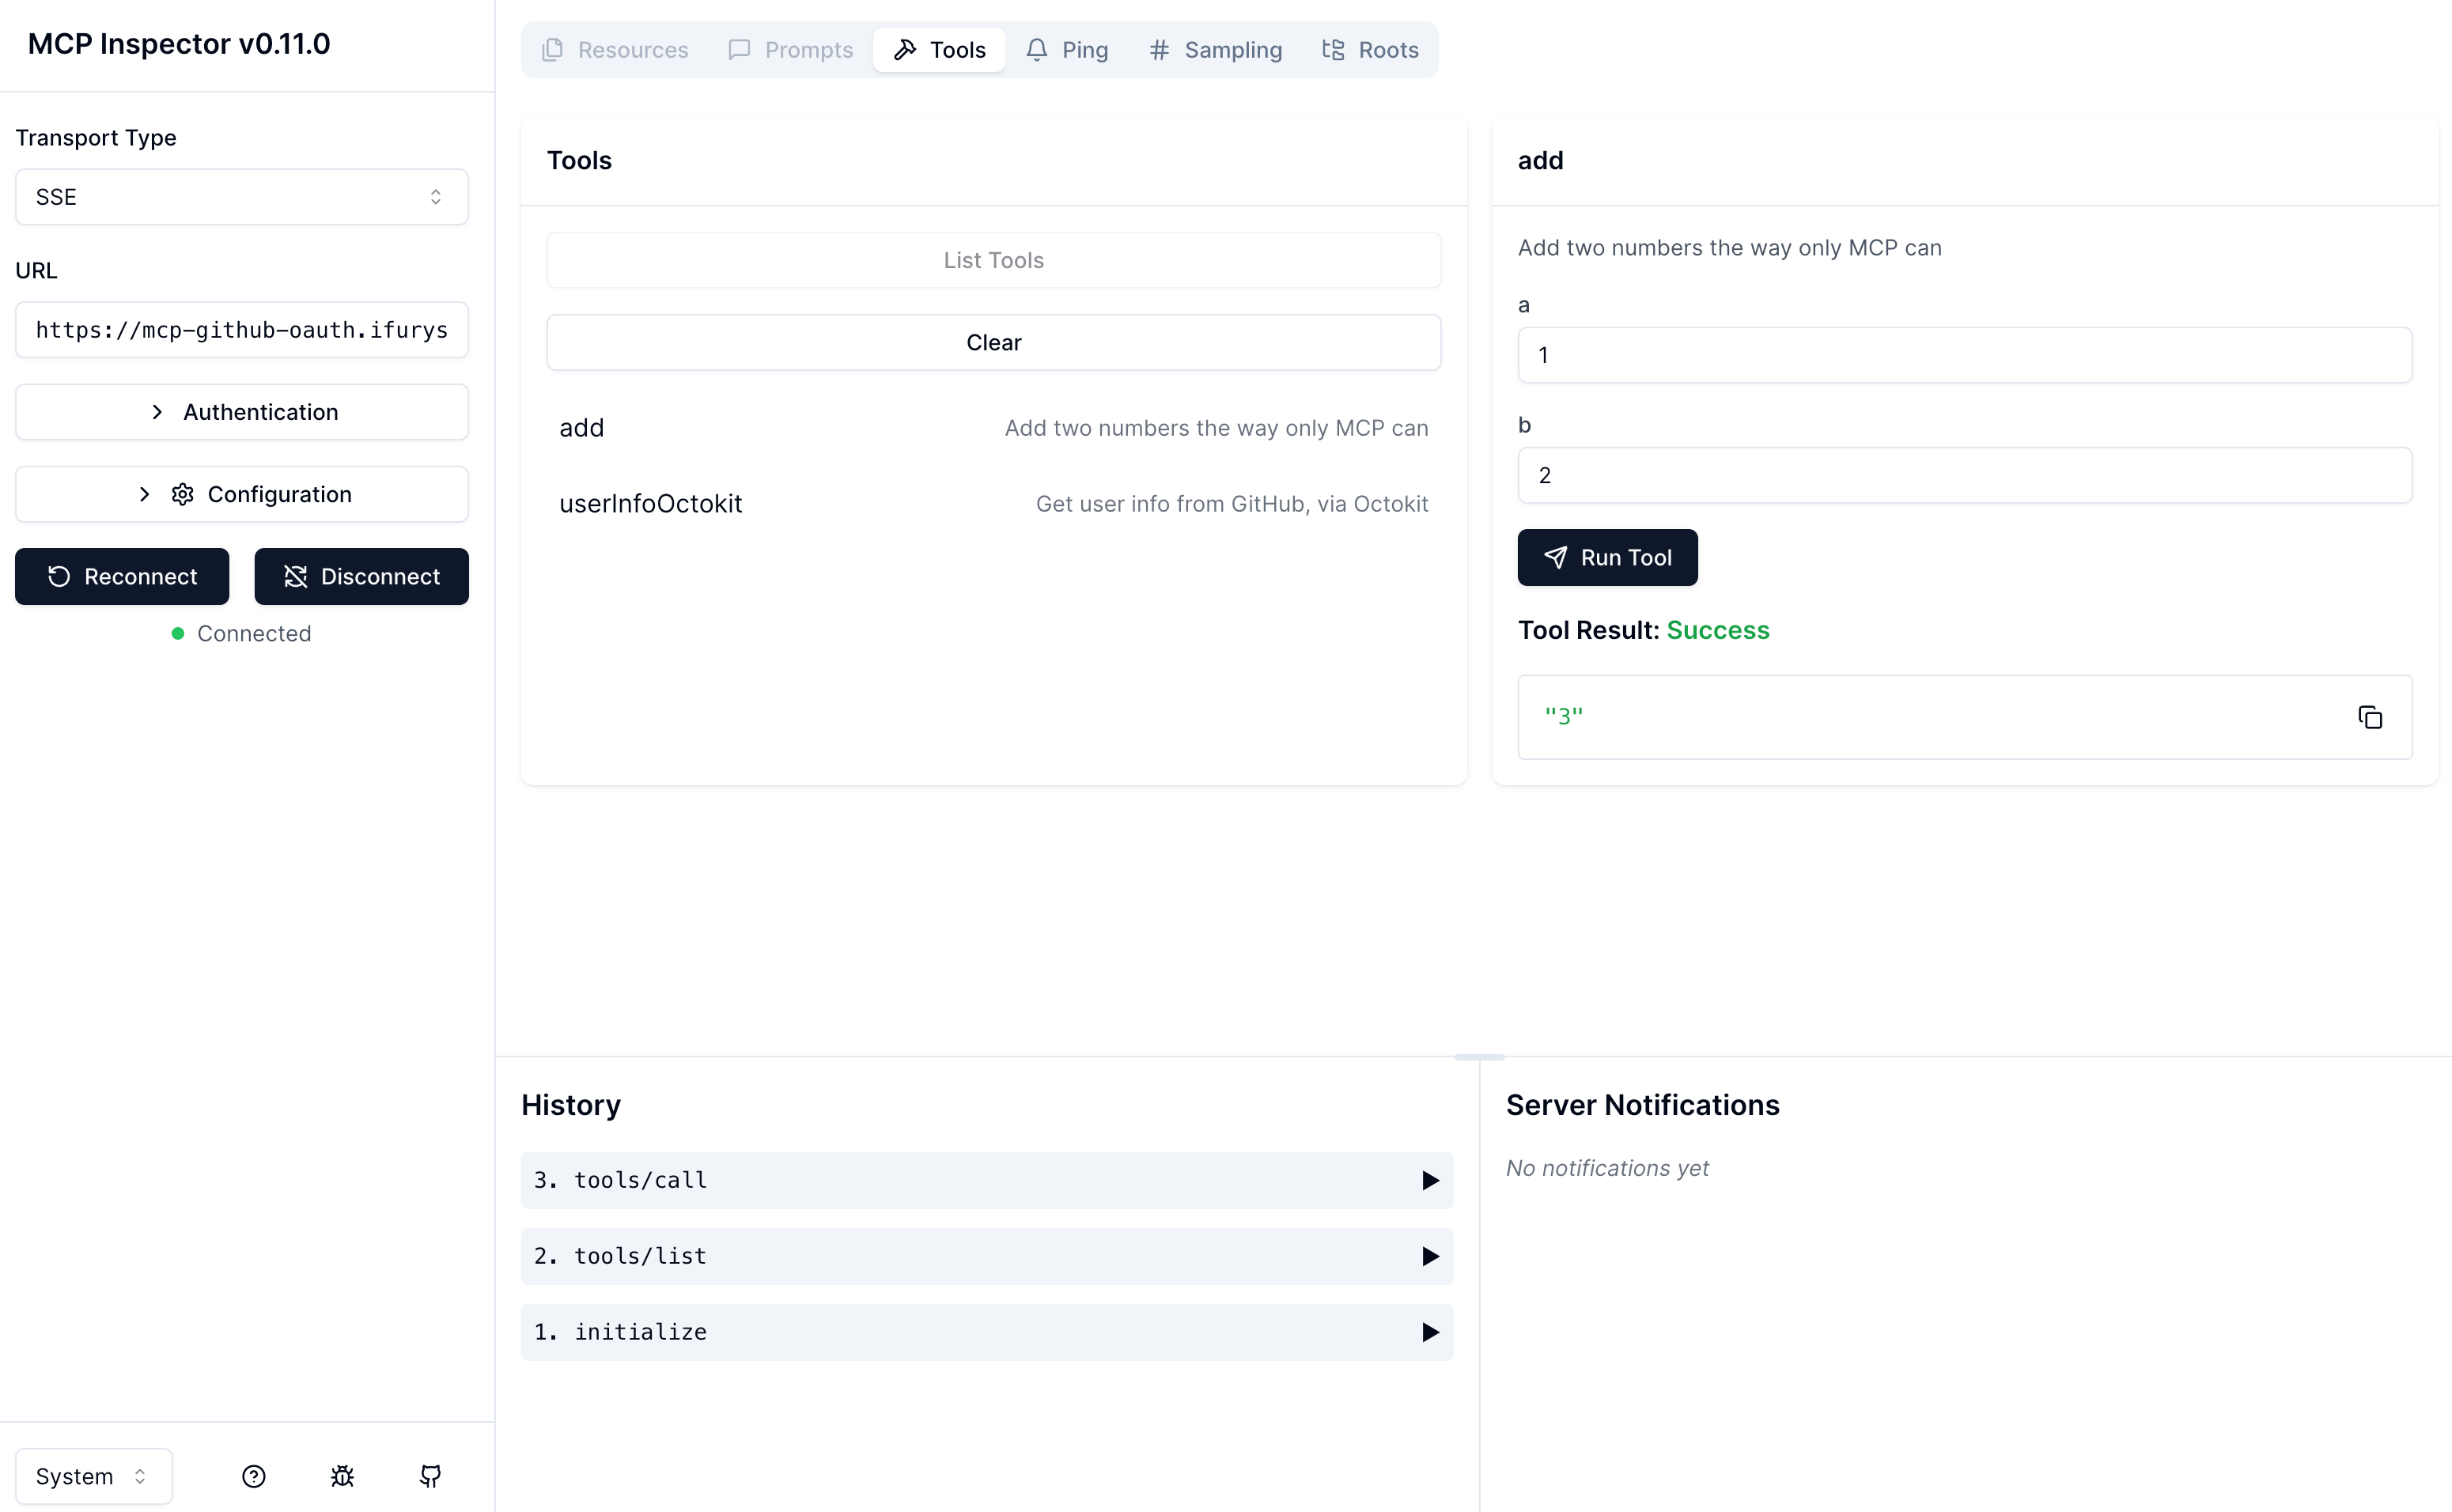
在浏览器整个流程相对丝滑,如果是客户端的MCP Client,通常是跳转浏览器做登录或者应用内打开外部网页做登录,这里涉及到应用本身也需要监听,因为需要对callback做处理
结论
MCP是个年轻的协议,提出大半年,鉴权方案也是3月份新的修订才有的,这里其实存在一定的争议,有人认为这不是最佳实践,我们可以看这里的讨论。也就是现在其实更多是把MCP Server当作OAuth授权服务器,这样对于MCP Server的提供者是一个负担,大部分MCP Server更偏向于一个轻量的或者微服务形态的,还需要他们去集成对应的鉴权,无疑是巨大的Effort。
基于这个,目前MCP Gateway正在开发面向端侧的鉴权体系,这样可以让MCP Gateway适应更多的场景,各类服务也可以接入MCP Gateway快速适配认证场景。
如果你感兴趣我的开源项目,欢迎使用、反馈和任何的贡献参与
https://github.com/mcp-ecosystem/mcp-gateway
Enjoy Reading This Article?
Here are some more articles you might like to read next: